Monthly Archives:

January 2015

Day-to-Day

Pequenas Observações (Desconexas).

January 15, 2015

Hoje eu comecei o dia com a perspectiva de uma única aula, à noite, das 19h às 22h, então, tudo para ser um dia super produtivo. Estranhamente, no meio de uma semana de pura neblina ao amanhecer e anoitecer, hoje o céu tava limpo e tivemos um nascer do Sol surrealmente bonito. Só vi as fotos aparecendo no feed do instagram e facebook. Antes disso, quando abri a cortina e vi que tava tudo limpo lá fora, fui correndo pegar a câmera pra fazer testes e (se tudo der certo) versões finais de coisas pro demo reel. Fiz umas costuras de fotos que somam 90mp e cada uma tem 500mb, para fazer camera projections – mais sobre isso nas próximas semanas. Ainda no clima de aproveitar esse tempo aberto, fiz cinco variações de HDRIs aqui no quarto (aqueles panoramas 360 graus, que a gente usa em 3D como mapa de reflexos e iluminação).

Com a câmera no tripé, parti direto pra garagem e fiz mais HDRIs e panoramas por lá. Não eram 9 da manhã e eu já tinha tirado 260 fotos – no total, essas todas foram convertidas em ONZE imagens, sem jogar nada fora. No processo de mesclar essas imagens, acho que aprendi todos os bugs do PTGui, e agora já tô indo mais rápido.

Dei uma geral na casa, lavei a louça, voltei a escrever no EOSHD e tô bem concentrado em fazer meu instagram ir pra frente. Acabei de perceber que nunca postei meu link aqui, então, lá atendo pelo nome de hovering lights. A estratégia é postar três fotos por dia, pelo menos, uma de manhã, sobre lentes, anamórficas, curiosidades, de tarde, algo mais livre e experimental, seja de técnica, seja de fotos que gosto mesmo, e de noite são séries com temas claros, alternadas. Até agora, são pouquíssimas fotos NOVAS por lá, tô reciclando um MOOONTE de coisa, afinal, quase dez anos de fotografia, alguma coisa tinha que prestar, né? Enfim, passando as filmagens do demo reel, nesse fim de semana, já tô combinando com a May de fazermos novas séries e idéias. Tenho que aumentar o público pra quando o demo reel estiver ficando pronto!

Fora essas coisas de computador, de Terça pra Quarta eu tive um sonho MUITO louco, que ainda tô considerando se posto aqui ou não – sério, era muito narrativo! – e quando sentei pra escrever, antes de ir pra aula, levei meia hora, sem parar, e quase me atrasei – que era uma das situações no sonho. No caminho, deixei o celular cair e acertei um mega chute no coitado que saiu escorregando na calçada. Fui correr pra pegar, deixei cair minhas luvas, voltei pra pegar, vi o ônibus passando (mais uma coisa que era bem presente no sonho) e saí correndo feito condenado pra alcançá-lo. No fim, nem me atrasei.

Terça eu reservei o estúdio de greenscreen da VFS, e um monte de equipamento de luz, e montei minha basezinha lá pra filmar com o Fernão umas coisinhas rápida pra usar no reel também. O Petar tava por lá e me ajudou a matar uns flares, posicionar luzes e foi um stand-in valioso. Com o Fernão, filmamos menos de dez minutos e já tinha material de excelente qualidade – amanhã posto um frame divertido. Depois, fizemos um photoscan rápido (ver meu instagram pra fotos disso) e depois desproduzimos tudo pra devolver.

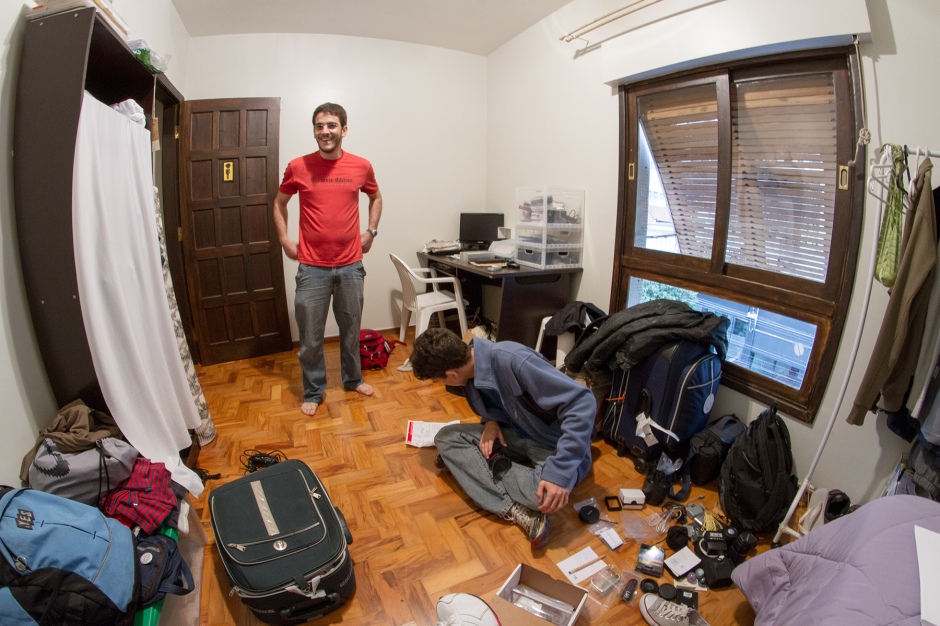
Já que esse post tá totalmente aleatório, vou assumir a linguagem e cada parágrafo vai falar de algo (provavelmente) desconectado do anterior. Pelo lado bom, o título vai fazer sentido e vai dispensar qualquer título alternativo – que já tá virando tendência por aqui.

Terminei de traduzir o TCC, como vocês devem ter visto, e tenho recebido BASTANTE feedback legal, tá se provando um texto de grande valor agora que ele atingiu seu real objetivo: popularizar o conhecimento, de forma global. Já fiz novos contatos – em vários países – por conta dele, e o tema das anamórficas tá longe de morrer, o que é definitivamente positivo. O número de visitantes no blog por dia praticamente triplicou só por causa desse treco!

Ontem minha mãe ligou pra cá, pra skypearmos. Durante a conversa ela falou várias vezes que eu tava com uma cara diferente e tava parecendo bem mais animado. Me sinto mais animado mesmo, mas não achei que era tão fácil de perceber assim! Hoje, meu pai ligou. Conversamos sobre… programação! Algo que eu realmente não esperava, e de súbito, meu pai faz o mesmíssimo comentário de minha mãe “você tá mais animado aí, hein Tito?”. É, acho que eles me conhecem mesmo! HAHAHA!

No tempo livre durante a tarde, me atualizei com Person of Interest – faltava ver dois episódios, ambos incríveis – e assisti American Sniper, que não é um puuuuta filme, mas tem seus momentos – tem uma cena particularmente foda, que faz o filme todo valer. Aí foi chegando a hora de ir pra aula, tomei meu banho, vesti minhas 3240283 camadas de roupas e saí de casa. Quando chego na esquina, tentando abaixar o volume do celular, clico na mensagem de um colega, avisando que a aula foi cancelada. QUE SORTE QUE EU NÃO TINHA ENTRADO NO ÔNIBUS AINDA! Dei meia volta e cá estou, escrevendo esse post, criando coragem pra escrever mais um, em inglês, ou algum dos outros dois super-elaborados em português que estão fazendo aniversário nos rascunhos. Bom, esse aqui já deu o que tinha que dar.

AH! Um último comentário solto. Enquanto tava em Salvador, consertando o computador de Lila, com Lila – Madalena conseguiu jogar o notebook no chão – achei Worms Armageddon no Steam. Worms Armageddon é um clássico da minha infância, jogando HORAS E HORAS a fio com Sr. Pedro Alban e Leonardo Barreto. O jogo tem um modo single player com desafios e missões que a gente levou MESES pra completar. Resolvi comprar o jogo pra ter o que fazer durante o vôo de Salvador pra São Paulo. Nessa sentada, e mais duas aqui em Vancouver, consegui matar a porra toda. Eu lembrava de TODAS as missões e treinamentos. Ainda assim, foi muito divertido de jogar tudo de novo, sem ter que fazer mil gambiarras pro jogo funcionar no Windows 8 (como já tinha tentado e falhado miseravelmente no Win 7).

Menti, e tinha mais um parágrafo solto. Semana passada eu fui atrás de soluções práticas pra umas questões de luz do demo reel – e da casa também. Desde que peguei um abajur jogado no lixo, a iluminação da casa deu uma melhorada. O problema é que a tomada mais bem localizada do apartamento inteiro tava pifada desde que a gente se mudou. SEIS MESES morando aqui, e eu não tinha consertado essa maldita. Então, um dia de tarde eu passei na Dollarama, comprei um jogo de chaves e vim pra casa arrumar essa parada. Minha sorte: acho que comprei o ÚNICO jogo de chaves, na história do universo, incapaz de desparafusar qualquer coisa. Resultado, não consegui arrumar. No dia seguinte, aproveitei a tarde livre pra comprar OUTRO jogo de chaves (cada um foi $2, então o prejuízo é pequeno), e passar na Home Depot à procura de outros itens valiosos – alicate, fita isolante, voltímetro, um dimmer e uma lâmpada melhor pro abajur. Achei tudo, e gastei umas boas horinhas arrumando a fiação – tem um fio morto lá dentro, que não passa energia por nada no mundo – mas agora temos tomadas operantes, um abajur sucesso, com dimmer e tudo, e a casa vira um pouco mais nossa.

Agora sim, CHEGA.

Anamorphic

Anamorphic on a Budget – Chapter VIII

January 11, 2015

< < BACK TO CHAPTER VII - CONCLUSION

BIBLIOGRAPHY

ABOUT ANAMORPHIC LENSES AND ADAPTERS

BORDWELL, David. Poetics of Cinema – Chapter 10: Cinemascope. EUA: Routledge, 2007

REID, Andrew. Anamorphic Shooter’s Guide, 2nd Edition. EUA: EOSHD, 2011

MEUSY, Jean-Jacques. Henri Chrétien, Bernard Natan, and the Hypergonar. Film History, Vol 15 (pg 11-31). EUA: Indiana University Press, 2003

EOSHD Forum

ABOUT CAMERAWORK, LIGHTING AND HARDCORE DSLR SHOOTING

BROWN, Blain. Cinematography: Theory and Practice: Image Making for Cinematographers and Directors. EUA: Focal Press, 2011

LANCASTER, Kurt. DSLR Cinema: Crafting the Film Look with Large Sensor Video Cameras. EUA: Focal Press, 2012

MASCHWITZ, Stu. The DV Rebel’s Guide. California: Peachpit Press, 2007

REID, Andrew. 5D Mark III RAW Shooter’s Guide. EUA: EOSHD, 2013

REID, Andrew. 50D RAW Shooter’s Guide. EUA: EOSHD, 2013

MagicLantern Forum

Anamorphic

Anamorphic on a Budget – Chapter VII

January 11, 2015

< < BACK TO CHAPTER VIC - WORKFLOW

CONCLUSION

Looking through the lenses is a must in order to understand how they work. Was the time I spent researching, reading and experimenting online elightening? Sure, but it doesn’t cut even close to the very first minutes handling each lens and seeing the world through the camera. The ideas and concepts are very confusing until you get to the practical side of it, where articles and tests fit together and the use of anamorphics makes perfect sense. Having the lens at your hands doesn’t just illustrate what was read before, it’s much more than that. Using them creates new questions and drives more research and reading.

On my first tests, boy, I suffered before getting ANYTHING in sharp focus. Then, a couple more months passed until I could get them aligned properly every time and finally managed to grab the proper diopters. Did I every think about quitting this madness and go back to what I used to do before? SURE! There were times when things messed up and the anamorphic picture just wouldn’t show me any respect. In these cases, I didn’t think twice before unscrewing the bastard out of my taking lens and shooting safe. After each one of these “crashes” I went back a couple steps, retested stuff, figured out the ways of each adapter and worked on their particular problems that made the set experience harder.

It was just very recently that I felt safe enough to decide whether a lens is just a “good lens” or if it’s a “lens that works well with my shooting style”, and this was only possible because I took plenty of time to play extensively and carefully with each and every one of the anamorphics that came across my path (and the ones I changed my path to get, of course!).

The lenses and format’s personality are so overwhelming that they got me past the point of no return. I’ve get rid of almost all my spherical lenses, keeping only the gear that fits an anamorphic workflow. I was kind of “photographically reborn” in which I had to leave behind many old practices that I had as standard and safe, and explore new techniques, ever more and more demanding, seeking visual excellence and a different feel from what we currently see at Brazilian cinema, TV or web productions.

An amazing thing about the anamorphic niche is how friendly and helpful its world community is. It’s very quick and easy to get answers, tips and feedback regarding any aspect of the lenses or videos. This acceptance was a key feature to keep me on track, along which I dealt with folks from various countries (USA, Canada, Ukraine, Russia, Spain, Germany, UK, Australia and so forth) with various questions and inquiries, always with good response. During this journey I made many friends – in conversations that went deeper than just buying or selling advice or specific questions – and we still email each other ocasionally to talk, not only about anamorphics, and hear thoughts and comments that are widely different from our own.

Through this series of articles I hope to open doors to enhance the discussion, research and use of these lenses in the Brazilian (now not only Brazilian, I guess) productions and sets. There are plenty of questions and curious people about the subject, so if this article works to gather people around a common starting point, solving some of the most basic doubts and issues, so everyone can move on to their own level of research, conducted by the multitude of different concepts and goals of as many as the number of users – this alone is more than enough to keep me going. This is the (in)conclusion of this essay.

A wonderful aspect of this whole process was that, since it’s a developing field, there are no strict rules, good and bad, right or wrong. There’s more than enough room for experimenting and developing a new visual format, based around a larger frame, widening horizons for all of those involved.

TO CHAPTER VIII – BIBLIOGRAPHY >>

Anamorphic

Anamorphic on a Budget – Chapter VIC

January 11, 2015

< < BACK TO CHAPTER VIB - ON SET PREVIEW

WORKFLOW

DISCLAIMER: This was written long before the MLV format and real time players for MagicLantern’s raw files! More on that in the future, I hope.

The most complicated step on this process is dealing with the raw footage. The anamorphic bit is quite simple to work out, but both aspects will be properly explained on this chapter, starting with the easy one, not taking raw into account.

If the footage was shot on the camera’s standard codec, we can stretch it out to the correct aspect ratio directly in the editing software (FinalCut Pro, Adobe Premiere, Sony Vegas or whatever other program you use) by changing the clips’ pixel aspect ratio according to the lens stretch factor, without the need to render new files with the stretch applied to them.


Pixel aspect ratio options available in Adobe Premiere CS6

Working with anamorphic still images requires two steps, though. The first one, importing the raw image into Adobe Lightroom or Adobe CameraRaw (or any other software, really) and playing with its exposure, contrast, highlights, shadows or any of the many control knobs available so the image looks right in terms of light and color. The second step is loading this file on Adobe Photoshop in order to fix the stretch, since neither Lightroom nor CameraRaw give you the option to change the image’s pixel aspect ratio or its height/width relationship like the video editors do.

Now, raw: the first step is to set up the camera to shoot with the proper resolution, taking into account the lens’ stretch factor. Inside MagicLantern’s menu, this is very simple to set up.


MagicLantern’s RAW Video Menu

Some of the most common and desired ratios are shown below as a quick cheat sheet where you can set any two variables and get the third one.

Shooting Frame Lens Stretch Final Aspect Ratio
16:9 1.33x 2.35:1
16:9 1.5x 2.66:1
16:9 2x 3.56:1
4:3 1.33x 16:9
4:3 1.5x 2:1
4:3 2x 2.66:1

Final Aspect Ratio Lens Stretch Shooting Frame
2.4:1 (CinemaScope) 1.33x 1.8:1
2.4:1 (CinemaScope) 1.5x 1.6:1
2.4:1 (CinemaScope) 2x 1.2:1

These aspect ratios on the second table (1.8:1, 1.6:1 and 1.2:1) aren’t exactly achievable on MagicLantern’s menu, so the simplest way is to pick the closest proportion to what you want, only a little bit larger than your desired Final Aspect Ratio (for example, in Episode 01 we used 2x stretch lenses, so we should shoot with a 1.2:1 proportion, which isn’t available on the menu. The closest one to 1.2 available is 4:3 – which reads as 1.333 – just a bit larger than what we wanted, for safety. It’s always better to overshoot than the other way around. The last step is discarding this extra side portion during the editing/post-production stage.

Due to these different window sizes, files end up with different sizes as well and each card may store a little more (or less) footage. During Episode 02, 64GB cards allowed us to shoot ten minutes of footage. For Episode 01, since the window was smaller, each card lasted 17 minutes, which is a considerable difference considering how frantic a set can be.

After setting up the camera and shooting until the card is full, we get to the thickest part of the workflow. There are several options for these steps online, but here I’ll go over the one I used in both episodes, which had the goal of being as simple and straightforward as possible.

The card goes into a USB 3.0 reader and the files are copied over to the movie’s hard drive – also USB 3.0, since the files are massive and we have to go through them as quickly as possible to free the card so it can go back to the camera crew.

The files are not “playable” at this point, they’re simply huge envelopes that store the DNG frames (until now there’s only one software that can play them natively, the Drastic Preview Professional Media Player). In order to keep going down the flow, we must first extract these frames and generate proxy versions (lighter files with a lighter encoding, like Apple ProRes) for each clip that will be used on the edit and, later, replaced by the DNG sequences that give us a LOT of power for color correction, adjustments, effects and post-processing. They’re VERY heavy, though.

For this extraction process we used RAWanizer, a piece of software developed by a MagicLantern user, fulfilling the requests made by several forum members. There’s plenty of software options available for this extraction and conversion process, like RAWMagic or raw2dng, but for our Windows machines, RAWanizer was quite simple and quick to use.

Installing and navigating the software is easy. After install, just follow the steps:

Clicking on the “A” letter, Select Folder you set the folder where the raw files are. Depending on how you’re loading the files and organizing them, it might be a good idea to check the “B” letter, Watch Folder so the software checks the folder at all times looking for new files recently copied from cards. You just have to be careful when checking this option because if you delete the watched folder, the program might crash while trying to find it.

After selecting the folder, all the shots found inside will be loaded into the grey area marked by the “C” letter. Checking the Show Thumbnails box, RAWanizer will grab sample frames from the beginning, middle and end of each shot for preview.

The following steps will happen in the blue highlighted square.

On the Processing tab you set the steps the program will follow: if it will just extract the DNGs out from the raw container, if the processing will be done by an external converter or if all steps (DNG extraction and proxy rendering) must be completed for each clip before moving on to the next one.

After that, in the Video tab, you can choose the codec that will be used for the proxies from the dropdown menu (which says ProRes 444 on the image). It’s also important to specify the video’s frame rate, even though some times this information comes straight from the camera. With a little more advanced knowledge one can change the codec’s settings through code, being able to even stretch the proxies to the correct aspect ratio.

In File we check the boxes that must be considered after the raw file is processed. The ones that worked really well in our case were Keep existing dng files because even if we tried to process the same file twice, RAWanizer would detect the duplicate files and skip it altogether. The same goes for Keep existing video fles for avoiding double proxies.

Then the options for Delete dng files after video creation would erase the files we wanted so much for post, so, no checking that one. Delete tiff files after video creation was useful, though, because these TIFF files weren’t being used for anything else down the line.

Since many cards were being formatted inside the camera, and it follows the FAT32 file system, files bigger than 4GB were split in more than one chunk. The option Merge split files into original RAW file forces RAWanizer to stitch these chunks back together before processing the file. If this box isn’t checked, the software will just go through the first 4GB of the clip and skip the others. A way to avoid split files altogether is formatting the cards directly on the computer and selecting the exFAT file system which doesn’t limit to the file size.

The steps taken by RAWanizer are: first, check if the file has more than one 4GB chunk, if yes them all will be stitched together. Then, all the DNG frames contained inside the raw file will be extracted. The slowest step comes next, when generating the proxies, every DNG frame must go through debayering and an average exposure is applied to every frame and then they are rendered as TIFFs. These are then rendered together by FFMBC creating the proxy as specified in the previous menus.

The last tab to go is Folder which points to where each type of file created during the process should be stored, from the original raw files down to the proxies. Keeping these organized will be of great use when the edit is finished and you just need to replace the proxies with the DNG sequences.

After filling all these tabs, just press Start (letter “G” on the first image) and all the items listed in “C” will be transferred to “E” with checkboxes that tell you which files have been already processed and which ones are still up to go on the queue. The “F” window acts as a log, writing out which step is currently happening and if the previous steps were successful or failed. It’s always a good idea to check this once in a while to be sure everything is going as planned.

After ALL your files go through processing, you gotta hand the proxies to the editor. They have a terribly low quality – and exposure usually looks very weird – but it’s enough to check if the shot is in focus or not, for example. It’s very important to let the editor know the lens’ stretch as well so he/she can set the proper aspect ratio for the footage in the editing software.

When the editing is done (using the proxies), we went on to color correction, which could’ve been done with DaVinci Resolve or Adobe After Effects, through Adobe CameraRaw. Since I was much more familiar with After Effects, this was the package I chose. Just for the sake of information, from version 9.1.5 forward, DaVinci Reslve is fully compatible with MagicLantern’s DNGs, not only with Cinema DNG files.

After bringing my timeline into After Effects, I replaced the Apple ProRes proxies with their DNG counterparts. For every clip I replaced, a CameraRaw window popped up so I could set the image’s parameters. Keeping time as a valuable part of the workflow, I’ve set a couple defaults to be applied to clips that should match together, making sure the whole episode had a homogeneous look so the real grading would have to go all sorts of crazy to compensate drastic differences between shots.

In the composition settings I’ve set the frame size according to the “shooting frame” x “lens stretch” math we saw before. To stretch every clip I had two possibilities: through the “Interpret Footage” tab on the Project window, or selecting all the clips in the timeline and clicking the option “Transform > Fit To Comp“.

After going through all post-processing it’s time to get the final video out of After Effects. Once again, we have two possibilities: rendering a “larger than HD” frame or compensate the stretch by decreasing the height, instead of increasing the width. It’s good to keep in mind that it was just recently that YouTube started supporting resolutions higher than 1920×1080 pixels, so stretching the clips to 2880x1080px, for example, would present a greater risk of losing image quality since the downscaling from 2880x1080px to 1920x720px would follow YouTube or Vimeo’s rules, not your own. Even though you can go higher, most audiences are happy with Full HD or 720p resolutions.

My suggestion is to decrease the height of the clips on the final export and have full control over this scaling instead of leaving it into someone else’s responsibility. The height percentage’s for 1.33x, 1.5x and 2x stretch lenses are, respectively, 75,8%, 66.7% and 50%, which gets us 1920px width, but variable height according to the lenses used. This scenario is particularly useful for high compression codecs since you have a smaller area to fill with information, instead of blowing up all the compression artifacts over a larger frame. Since our goal was not only test the results online but also on 2k and 4k projectors, I ended up blowing the image up to a 3072x1152px resolution.

After all the color correction and effects were done, we decided to keep the 2.66:1 aspect ratio instead of the traditional CinemaScope, so the only step left was to export the final version of both episodes, bringing all this ridiculous amount of theory into practice!

TO CHAPTER VII – CONCLUSION >>

Day-to-Day

Sem Casa Definida – mimimi, eu eu eu.

January 11, 2015

Apesar de ainda ser o décimo dia de 2015, parece que tem séculos que voltamos do Brasil. Esse post vem na rebarba das reflexões do trajeto Vancouver – São Bernardo – São Paulo – Salvador – São Paulo – São Bernardo – Vancouver em menos de duas semanas. A sensação de “visitar” esses lugares todos onde morei por vários anos e me sentir um hóspede em cada um deles foi algo totalmente diferente. De não ter obrigações de fazer nada, de poder ficar à toa o dia inteiro, de não ter que sair pra comprar comida, de não ter que arrumar a casa, lavar a louça, essas coisas que geralmente sobram pro dono da casa. Ok, em São Bernardo eu tava na casa da May, e nunca tive um quarto lá (mas já aluguei bastante o beliche de cima!), mas em São Paulo, entrar no apartamento foi a primeira das experiências.

Era o mesmo lugar, o mesmo espaço, o mesmo endereço, os mesmos objetos, mas ao mesmo tempo, parecia algo totalmente diferente e novo. Lila tá morando sozinha lá já tem quatro meses – e já tem seis que eu saí – então tava BEM a cara dela. O nosso quarto (meu e da May) tava quase igual ao que era, com todas as roupas no guarda-roupa, penduradinhas, todas as caixas e restos de equipamento que eu tinha deixado organizado, tudo exatamente no mesmo lugar, como congelado no tempo. Acho que nunca ter passado tanto tempo longe foi justamente o que me trouxe essa sensação, de que a casa toda tinha andado, mas o meu “eu” daquele apartamento ainda era o mesmo, que usava as mesmas roupas, lia os mesmos livros e quadrinhos, e dormia na sala assistindo TV quando a May não tava lá pra gente dormir junto. O eu que leva as garrafas de água da geladeira pra deixar do lado do sofá e não ter que levantar pra pegar depois. Que come bolacha Maria com requeijão assistindo série, sei lá. Se eu tivesse ficado em São Paulo, pode ser que nada mais dessas coisas fosse verdade.

Essa foto é tão velha que eu nem lembrava que um dia esse quarto tinha sido tão caótico. Dessa configuração até a configuração de móveis, cama, armário, que deixei pra trás, o ritmo das mudanças era quase constante. A cada mês ou dois a gente trazia algo novo, inventava algo pra mexer, trocava coisas de lugar, pendurava algo na parede, melhorava a cortina. Parecia que o lugar tinha vida própria, mas acho que a vida dos lugares quem faz são aqueles que os habitam – eu juro que ainda não achei as palavras pra traduzir a sensação de tempo parado, por isso que ainda não mudei de assunto.

Acabei ficando pouco tempo por lá antes de ir pra Salvador – menos de 24h. E mesmo esse intervalinho já foi tempo mais que suficiente pra pausar o Tito-Vancouver e apertar play no Tito-São-Paulo. Dormi no sofá, vendo TV, já que a May não tava comigo. Espalhei um monte de equipamento no tapete da sala pra arrumar nas mochilas – como faria na véspera de uma diária – rearrumei caixas, joguei coisas fora, li mais um tanto no sofá, enquanto ainda tinha luz lá fora, me livrei de todos os casacos e vesti bermuda e camiseta – que estavam abandonadas no guarda-roupa, vale lembrar. Roubei um chinelo de Lila, pra manter a tradição.

A sensação é que a vida em São Paulo não tem o drama do desconhecido que a vida aqui tem.

Aí veio Salvador. Salvador já tinha um quê de “passado”, porque nossos quartos (o meu e o de Lila) praticamente não são usados quando a gente tá por lá, e quem usa mesmo a casa é minha mãe. Em Salvador eu deixava as roupas que eram muito velhas ou inadequadas pra São Paulo – muitas bermudas, roupa de banho, infinitas camisetas da Paperball, infinitas camisetas do Arraial, essas coisas. Acho que os seis meses passaram sem ninguém nem abrir as gavetas daquele armário.

A casa em si tem bastante vida e tá sempre mudando, mas o quarto eu acho que não muda nada desde que fui pra São Paulo em 2008. Na verdade, eu tô sempre me empenhando em esvaziá-lo toda vez que apareço. Primeiro tirei o computador, depois fui jogando fora o monte de tralha que se acumulava lá por conta da Paperball – restos de equipamento, roupas estranhas pra figurino, cadernos meio escritos – e roupas que entre uma visita e outra acabam ficando velhas e dôo adiante. Teve uma vez que achei OITO mochilas diferentes dentro de um dos armários. Enfim, tô começando a viajar demais.

A grande diferença em Salvador não foi a sensação da casa em si, mas sim a programação e atividades, foi ver que todo mundo segue sua vida. Foi encontrar com Fabute, Cogo, Deígo, Donk, Piu, Eliza e Nanda uma vez só em quase uma semana, ter um reg que não era lá em casa, ver todo mundo capengando de sono antes da meia noite por causa de trabalho, acabar o reg sem ninguém bêbado, ficou uma sensação de que a gente tá mais sério, mais adulto. Não sei se é verdade, só sei que foi a impressão que fiquei. Pode ter sido uma grande piada onde eu era a vítima! Foi um reg tão diferente que até ouvi histórias novas sobre acontecimentos recentes, e não repetimos histórias clássicas. Hahaha!

Se a vida em São Paulo não tinha o drama de Vancouver, a vida em Salvador não tem nem a seriedade da vida de São Paulo. Em Salvador eu absolutamente não ligo pra nada – se eu tô com cara de arrumado ou bagunçado, que horas eu acordei, ou se tenho que fazer algo no dia, eu juro que perdi a conta dos dias da semana! Salvador também tem seguranças que só existem lá: sempre tem muitas opções de comida na geladeira, sempre tem chocolate na despensa, sempre tem uma brisa boa pela janela, sempre tem mosquitos pra chuparem nosso sangue no deck e, se deixar, Kiko sempre entra no quarto pra dormir, mesmo que eu fique no computador até quase o dia nascer – o que é a coisa mais fofa do mundo.


May e Kiko

Voltando ao quarto, sem Kiko, por enquanto, descobri que boa parte das camisetas tava com um cheiro e textura estranhas. Mofadas! Muito tempo guardadas, exatamente como tinham sido deixadas. Essas coisas que a gente deixa são de “outros eus”, um eu que usa bermuda, chinelo e camiseta da Paperball, em Salvador, que come pão de mel e passeia de carro com minha mãe, que adora o calor e vive no calor, que brinca com gatos de manhã, de tarde e de noite. Um eu eternamente de férias e sem agonia pra nada. Um eu que sonha com trabalhar com filmes e fotos.

Em São Paulo, um eu que trabalha com filmes e fotos, que tem equipamento em casa, que corta fio, conserta cabo e desmonta lente, um eu que lê sobre cinema e (uns poucos) quadrinhos, que assiste tanto filme e série que tem um HD conectado direto na TV, com os melhores, pra ver coisas repetidas. Que sai de carro de madrugada pra não pegar trânsito – e mesmo assim não consegue evitar engarrafamentos -, que pede pizza pro jantar, que assiste Walking Dead com Lila e May no sofá da sala, comentando os dramas de uns episódios e reclamando do ritmo arrastado de outros. Que joga Catan com frequência, que compra coisas no eBay e torce pra elas escaparem da alfândega. Um eu que sonha em trabalhar com pós-produção.

Finalmente, estamos de volta em Vancouver. Vancouver ainda é novo. Seis meses é muito tempo no ritmo da VFS e pouco tempo no ritmo da vida. Acho que é esse desencontro relativo que faz as coisas parecerem estranhas. Tem cinco dias desde que as aulas começaram e a sensação é de cinco semanas. Cada dia é ridiculamente longo e tem muitas e muitas coisas pra fazer, sem contar com as coisas que não são da VFS. Acho que é por isso que quando tem dia sem aula, a última coisa que me passa pela cabeça é ser produtivo. Hoje a gente passou o dia todo largado aqui, sem fazer NADA – jogando Worms Armageddon de manhã e assistindo MasterChef Brasil de tarde – e pra mim foi um dia ótimo.

O meu eu de Vancouver ainda não tá definido. Ele tem rachaduras, porque é como se fossem dois eus, num mesmo lugar. Eu-VFS e eu-Casa, sendo que cada um deles tem como objetivo máximo forçar o outro a adotar seu próprio ritmo. O eu-Casa quer que eu vá devagar e faça menos coisas por minuto. O eu-VFS quer acelerar até o fundo pra evitar a pressão de não estar indo rápido o suficiente, e continuar ajudando o resto da turma em tudo que pode.

Nessa maluquice de dupla-realidade, quem mais se quebra é quem tá por perto e tem que conviver com as duas identidades: a May. Acho que se eu fosse ela, já teria perdido a paciência comigo, porque em muitos momentos até eu mesmo perdi a paciência comigo, mas ela não desiste. Eu não sei se morar sozinho seria mais fácil, mas acho muito difícil vencer a companhia de alguém que dá tanta coragem e inspiração pra ser uma pessoa melhor.

Depois de falar tanto dos quartos e casas passados, vou encerrar com essa foto do apartamento, que agora tá em sua versão mais “estável”, depois de muitas e muitas mudanças ao longo de cinco meses – quando eu cheguei aqui, era só um colchão no chão, uma poltrona, notebook e umas mesinhas que nem existem mais. Se os outros dois quartos estão congelados, esse aqui tá muito vivo, mas apesar de fazer tudo que é responsabilidade do anfitrião – lavar roupa, lavar louça, essas coisas que já falei – o desencontro de ritmos e o caráter incerto da estada após o curso me impede de ver esse apartamento como uma casa oficial. É engraçado, curioso e um pouco triste.

Day-to-Day

24 Horas de Aeroportos e Aviões.

January 3, 2015

A jornada de volta pra Vancouver foi longa e cansativa, acho que pelo simples fato de termos que ficar parados, sentados, por literalmente um dia inteiro até chegarmos em casa. Embarcamos dia 31 de Dezembro, o que, em São Paulo, é um pedido de engarrafamento, então saímos de casa super cedo e chegamos no aeroporto às 16h30. O vôo era 22h30. Tava tão cedo que tivemos que esperar o guichê da AirCanada abrir pra podermos despachar as malas. Lá dentro, toneladas de café, leite condensado, feijão e doce de leite.

O tempo ocioso abriu a cabeça pra muitos pensamentos e reflexões latentes dos últimos dez dias, e vou tentar colocá-los por aqui de forma razoavelmente organizada.

Primeira impressão ao chegar no Brasil, dia 20 de Dezembro: caramba, como a gente fala alto nesse país! Só de desembarcar eu já sentia que sabia em detalhes a vida de todo mundo ao meu redor. As pessoas falam aos gritos mesmo, ou foi só uma impressão minha? Talvez seja a familiaridade com a língua, que me faz entender coisas mesmo sem prestar atenção, mas o bombardeio de informações foi surreal, e a sensação durou até voltarmos pra cá. As conversas são umas coisas loucas, de um falando por cima do outro, assuntos totalmente não relacionados rolando simultaneamente entre as mesmas pessoas, crianças literalmente berrando por qualquer coisa, uma loucura. Acho que nunca teria reparado nisso se não tivesse passado esse tempo aqui, e e não fosse um sujeito quieto como sou. Definitivamente é mais caloroso, mas tem horas que o juízo cansa, acho que por falta de prática mesmo. Nessas horas eu fugia pro meu quarto e ia ler – mas sempre acabava dormindo.

Outra coisa: o clima! Falei no título do outro post, mas não cheguei a aprofundar. Cara, como esse calor tropical é a coisa mais maravilhosa do mundo. Me recusei a usar o ar condicionado em Salvador, e quando acordei pingando suor o primeiro pensamento era “que coisa maravilhosa é essa temperatura!”. São Paulo tava mais abafada, e de vez em quando dava uma sensação de forno, sem a brisa soteropolitana. Aí era um pouco demais, mas ainda assim, preferível mil vezes que o frio de zero graus que é a temperatura padrão do inverno por aqui.

Já no caminho do aeroporto pra casa da May, tivemos ótimas experiências de trânsito, com fechadas, ultrapassagens pela direita, buzinas, farol alto e tudo mais que se tem direito. É bizarro, mas senti alguma falta disso aqui também. É tudo tão calmo e tudo funciona tão bem que acaba faltando aquela válvula de escape onde você xinga todo mundo e qualquer um dentro do carro de janelas fechadas sem correr nenhum risco e sentir que tem toda a razão do mundo. Trânsito é, sem dúvida, quando eu mais xingo e fico puto no dia-a-dia brasileiro, e aqui nem trânsito existe, pra começar.

Mais uma observação curiosa, meu volume de roupas indo de Vancouver pra São Paulo: calça jeans, calça fina por baixo, meias grossas, bota, blusa térmica, dois casacos e duas luvas (uma por cima da outra). Chegando em São Paulo, me livrei de tudo isso. O plano era ir pra Salvador de calça, bota e camisa de manga comprida, porque eu sempre passava frio no avião, mas tava tão quente e tão agradável no nosso apartamento que resolvi correr riscos e fui de bermuda, chinelo – de Lila, quatro números menor que meu pé, amarelinho! – e camiseta – da Paperball, claro. Não me arrependo. Acho que a gente acostuma mesmo com o frio, e enquanto tinha uma galera de calça e casaco do meu lado, eu tava super de boa naquele ar condicionado furreca. Só a chance de usar bermuda ao invés de calça já é uma bênção!

Levei uns dias pra acostumar com as seis/cinco horas de diferença no relógio, e quando tava começando a entrar na linha, voltamos. Agora tenho que reacostumar com a loucura daqui, e rápido! Era engraçado só começar a sentir sono lá pelas cinco da manhã, e agora continua estranho acordar completamente às 4, porque a sensação é de 10 da manhã.

Falar português com todo mundo também é uma grande diferença. Não ter a necessidade de pré-traduzir tudo que se quer comunicar acelera o processo mil vezes, e as palavras vêm MESMO com muita facilidade. O mais diferente mesmo não era nem em casa, porque aqui a gente sempre fala português em casa, mas sim coisas pela rua, lojas, mercado, serviços. Diego até me corrigiu, porque eu tava falando português com a ordem das palavras em inglês, no nosso natal Paperball.


Paperball e minha magreza num encontro natalino.

Passei raiva em casa e nos aeroportos por causa do maldito padrão louco de tomada. Claro que eu não tinha lembrado disso, e fiquei sem bateria em diversas ocasiões.

Tenho mais coisas loucas pra falar sobre estar nos lugares que estive, casa, apartamento, casa da May, mas vai ficar pra um outro post, que a bateria tá morrendo, pra variar.

Anamorphic

Anamorphic on a Budget – Chapter VIB

January 1, 2015

< < BACK TO CHAPTER VIA - CONCEPT DEVELOPMENT

VIB – ON SET PREVIEW

One of my main concerns shooting anamorphic was how to take a look at the footage on set, at the correct aspect ratio, not squeezed like it’s being shot. This topic contains not only the time of shooting, but also reviewing a previous shot for evaluation.

Proper monitoring is really easy to solve through the use of MagicLantern’s features. In the Display tab, there’s an Anamorphic submenu. This submenu offers the most common lens stretches. By selecting one of the values, this stretch is applied to the LiveView and you see things in the right proportion while shooting.


Display Menu inside MagicLantern, Anamorphic option highlighted.

This path has two main downsides. First one, the stretch is not applied on Play Mode, images are correct while you shoot, but not while you’re watching a previous shot directly from the camera card. Second downside, even more serious, this LiveView distortion eats up a lot of processing power, which ends up blocking our ability to shoot raw.

If you’re shooting with the camera’s native H.264 codec or just still pictures, this is a great solution for it eliminates the need for any other piece of gear, devoted only to fixing the images’ aspect ratio.

Since our case wasn’t “I, by myself shooting and walking around” – we had predetermined locations, call sheets, storyboards -, a larger number of people need to see the shots as they happen (director, art department, sound, and so forth, each one of these areas looking for specific bits of information whithin the frame related to their work), which calls for a screen at least a little bigger than the camera’s LCD.

Unfortunately, not many external monitors feature anamorphic stretching among their menus. During pre-production I looked for some of them based on tips from other anamorphic users and specs from the manufacturers’ websites (only Zacuto, SmallHD and Cineroid provided this feature at the time this was written). Some TVLogic models present a feature called User Aspect in which you can set specific dimensions for the height and width of the frame, working similarly to a custom-made stretch.

I already owned a Zacuto EVF, which offers less options than the Anamorphic submenu inside MagicLantern but still covers the most common stretches – 1.33x, 1.5x and 2x. Image quality is excellent, but the screen size is exactly the same as the camera, with only 3.2″. Its performance is increased through the use of a loupe which allows you to pay close attention to every bit of the frame.

The Cineroid EVF4 has, as the name states, a 4″ screen and it’s not so much bigger than the Zacuto. It also has a loupe that must be used along with the small screen for optimal view. I couldn’t find any of these around São Paulo, but its manual states that through custom parameters you can apply any stretch value over the displayed image.

Saving the best for last, SmallHD offers a wide range of monitors with anamorphic stretch. DP4, DP6 DP7 and AC7 models are capable of anamorphic stretching for 1.33x, 1.5x and 2x lenses. The model number is equal to its screen size, in inches so none of them is really huge, the biggest one has 7″.

A common feature to all these monitors and EVFs is they provide both ins and outs for HDMI connections, while cheaper models have only an in port. Thanks to this pair we can chain them one after the other to make the camera’s image easier to share around the crew. On a simple system we used the Zacuto EVF paired with a SmallHD AC7. Since the Zacuto is smaller and lighter, it was stuck to the camera rig, while the bigger screen was further apart, for the other crew members to see.

That would’ve been enough if we weren’t shooting raw. Reviewing raw material straight in the camera is still pretty lousy, only goes a couple frames per second and lacks any color, which stands for “unusable”.

The solution we found for this problem was to use an external recorder with HDMI input – Atomos NUNJA 2 – as the first link in our monitor chain. Its recording was triggered directly by the camera and its footage was much easier and faster to review because it’s extremely light. From the NINJA the image stream would go through the Zacuto EVF which stretched the frame and then passed on to the SmallHD AC7, also with corrective stretch.

With this large number of small bits of gear and several meters of HDMI cables we were able to see each shot in the correct aspect ratio as well as reviewing them using the external recorder to decide if we should move on to the next or do another take. The chain also allowed the crew to stay further back instead of packing around the cinematographer and speeding up the work.

TO CHAPTER VIC – WORKFLOW >>