How strange do you think it is to shoot anamorphic photos and videos on your iPhone? It turns out to be a lot of fun using Moondog Labs’ 1.33x anamorphic lens.
Time to diversify my lens mods to more modern glass and autofocus. My first choice was to anamorfake the Canon EF 50mm f/1.4. Super simple process and impressive results!
Cinemodding a Contax Zeiss lens set is an endeavor I’ve been working on and off for the last two years and now I can see the finish line.
It all started when I stumbled upon a post on Craigslist from a guy selling his Contax Zeiss set. It had five lenses: 28/2.8, 35/2.8, 50/1.4, 85/1.4 and 135/2.8. The price was pretty good and I’m the type of person that can buy something just because the price is good. Speaking of good prices, many links in this post will take you directly to eBay searches of each specific lens!
Why Contax Zeiss?
So far, I had no previous love for Contax and a little bit of prejudice against Zeiss for making lenses too clean. As a reference, my main set of lenses at this time was a Soviet kit that I put together because of their imperfections and organic look. Also because Soviet glass was super cheap.
Original Contax Zeiss set on the left, Soviet set on the right. Easy to see which one I loved the most back in 2015
After I got the five Contax I went to look for more info and found Nick Morrison’s Contax Zeiss Survival Guide at REDUser. That’s where my obsession started. These lenses thread the fine line between organic and sharp, a line as thin as depth of field on an 85/1.2 wide open, only second to Leica. The main difference being that a normal human can afford Contax Zeiss but not Leicas.
If you wanna follow this path, there’s no way to dodge reading the Survival Guide. It’s been there for quite a while and I have checked up on it countless times to help me make decisions. Here are some things I got from it:
Contax Zeiss lenses were designed for 35mm full frame, which means they’ll cover all the way up to Vistavision sensors on modern cameras and anything smaller. As they were designed for photography, they have clicked stops, which has to be dealt with, but they all feature non-rotating front elements, which is a very valuable feature these days with vari NDs.
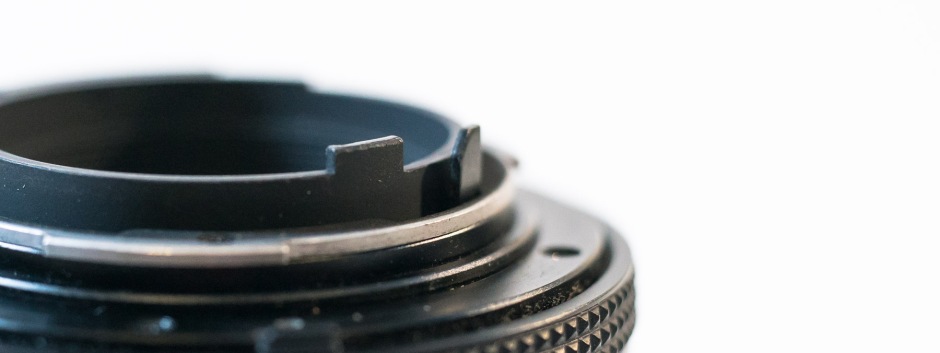
The lenses were made in two generations. The first one is AE and the second one is MM. It’s agreed that MM lenses perform better and have cleaner results than AE lenses, they’re also less prone to flaring. AE lenses also show ninja-star bokeh when stopped down, which is a major turnoff for some folks. You can tell them apart because MM have their last aperture number painted green, and they have a small tab on the mount that doesn’t exist on AE’s.
The tab and the last stop in green that mark MM lenses
One last note on their generations, MM’s were mostly made in Japan, so they’re called MMJ’s, while AE’s were made in Germany and named AEG’s. But Zeiss was so precious about these lenses that some of them were only made in Japan and others in Germany. This means that not all MM lenses are made in Japan. There are MMG lenses out there – I was weary of that for quite a while, since it’s not mentioned clearly anywhere. You can also tell their place of manufacture based on what’s written on the lens! On my set some were MMJ, others AEG. It was not a problem as a starter set.
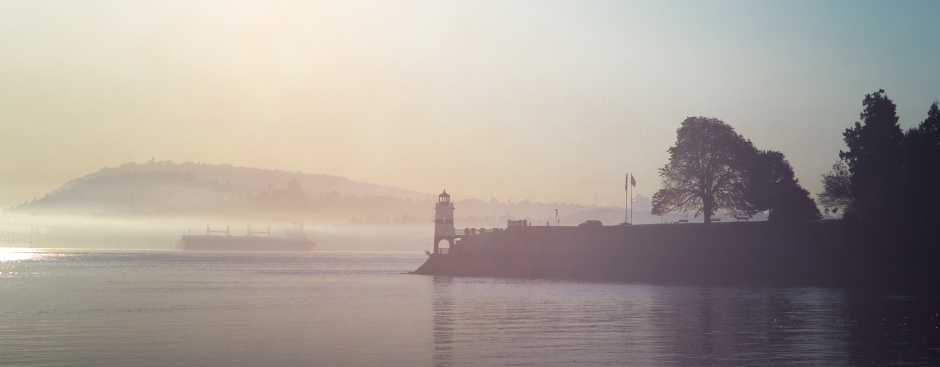
Back to the story. I started using these lenses casually. It was a time when I didn’t shoot much, but I went on long bike rides. I always took the 135 with me and some of my favorite photos come from that time.
Canon 5D3 + Contax Zeiss 135mm f/2.8
Slowly I fell in love with them. Whenever I started thinking the Soviet lenses were sharp, I’d pop one of the Contax on the camera and stare in awe.
DIY Mounts and Focus Gears
Momentum picked up and I saw myself getting ready to DP a webseries pilot. The Soviets were good enough for my own projects, but I needed something more reliable on this one. So far I had been using adapters on them, and they sucked. That’s when I learned of Leitax and their mount replacements.
Leitax mount on the left, original Contax/Yashica mount on the right
They are made in Spain, cost about 60 euros each and you install them on the back of the lenses using the provided screws. This turns the original C/Y mount into a solid EF mount that won’t budge for nothing.
I’m a fan of DIY, so I decided to install the mounts by myself. That was probably one of the most stressful experiences of my life with lenses. The screws on the back of the lenses are tiny, and if you strip them, you can’t get the new mount into place. Luckily for me, out of the five lenses I only messed up really bad on one (the 85mm, which was also the first one I tried). So I kept using an adapter on that one (the best adapter I had).
Horribly stripped screw on the 85/1.4
Still on the DIY train, a friend and I had just bought a 3d-printer, so I started making my own focus gears. I didn’t think too much about them when designing, they just needed to fit around the ring, and our printer was painfully slow (M3D, I’m looking at you). The process turned out alright and the gears worked great, but later on I learned some useful tricks.
When designing your focus gears, keep the number of teeth constant for all the lenses. This will ensure a constant outside diameter, which means you don’t have to adjust your follow focus every time you change lenses.
To fit the barrel of the lens, use a caliper and be precise about it. I like to add 0.3mm to the measurement to give me a little wiggle room after printing. In my experience, the gears never fit on the first try. So I sand the inside down a bit and try again. Another trick is to heat them up with a blow dryer or even your house heater. They dilate quite a bit and fit much more easily.
Plus, fitting these is never a “one-slip move”. You have to keep wiggling them slowly, side by side, until they are in place. The rubber grip on the focus ring of the lenses is awesome because it prevents the gears from sliding, but it’s also a pain because it makes the fitting a lot harder. Be patient, use heat and sandpaper, and you’ll get there.
Last point on the focus gears: the same way you always want to have a constant outside diameter, you want to place them on the lenses at the same distance from the mount. See the photo below! This is another trick to make lens swaps faster, since you won’t need to adjust your follow focus back and forth on the rig. You know, like a cine lens!
The last thing I did was add step rings to normalize all their fronts at 58mm, to make my life easier when swapping ND’s and other filters – or anamorphic adapters in my case.
Expanding the Set
For a little over a year, this was enough. But then work started picking up and I saw that as the perfect opportunity to upgrade. I returned to the guide and started eBay hunting. I went for the fastest lenses and snuffed out the AEG’s I had, in favor of the prettier bokeh of the MMJ’s. Lucky for me my 50 and 85/1.4 were already MMJ.
I started with the 28mm. The f/2.8 never really impressed me, even though it’s regarded as one of the best budget 28mm out there. Every time I had to pick a lens I went for the 35mm f/2.8 instead. After I read stellar reviews about the 28mm f/2.0 “Hollywood”, I went looking for one. These are way more common in AE, but I was lucky enough to find a MM coming straight from Japan. This was a game changer. The Hollywood is indeed a star. The image that comes out of it is much more appealing than the 28/2.8. It’s also a big change in size and weight, almost doubling its predecessor.
28mm comparison: 28/2.8 on the left, 28/2.0 “Hollywood” on the right
Next up was the 35mm, two stops faster at f/1.4. Standard lens, can’t really make a set without a 35mm in it, right? I’m gonna stop saying these lenses are sharp, because at this point it’s just standard! Impressive performance and also the fastest 35mm I ever owned. Also almost twice as big and heavy as the previous one.
The 135mm f/2.8 was a great lens. It’s the one I always took with me and it gave me gorgeous shots. There’s a lot of discussion whether the 135mm f/2.0 has a clear advantage over the f/2.8. This is especially poignant when you take into account the price difference. I needed the one extra stop of light though, for consistent f/2 or faster through the main set. My favorite lens switched to the 85/1.4 after that, though. Not saying the 135/2 isn’t worth it the investment. It’s just much heavier and harder to carry as a walk-around lens.
Then I redesigned and printed new focus gears for these. I also ordered more Leitax mounts and that was good for five months more. It’s a gradual process, guys.
Then, near the end of last year I decided to round out the set and make it suitable for renting. That meant getting a few more lenses and upgrading various aspects I had neglected so far.
The 21/2.8 was a must. It’s regarded as one of the best 21mm ever made. To this day Zeiss still uses the same formula for the 21mm f/2.8 ZF/ZE primes. This one was only made in Japan and it doesn’t exist in AE, just MM. It was the most expensive lens in the set. Also, it shares a lot of the beautiful look of the 28/2 “Hollywood”.
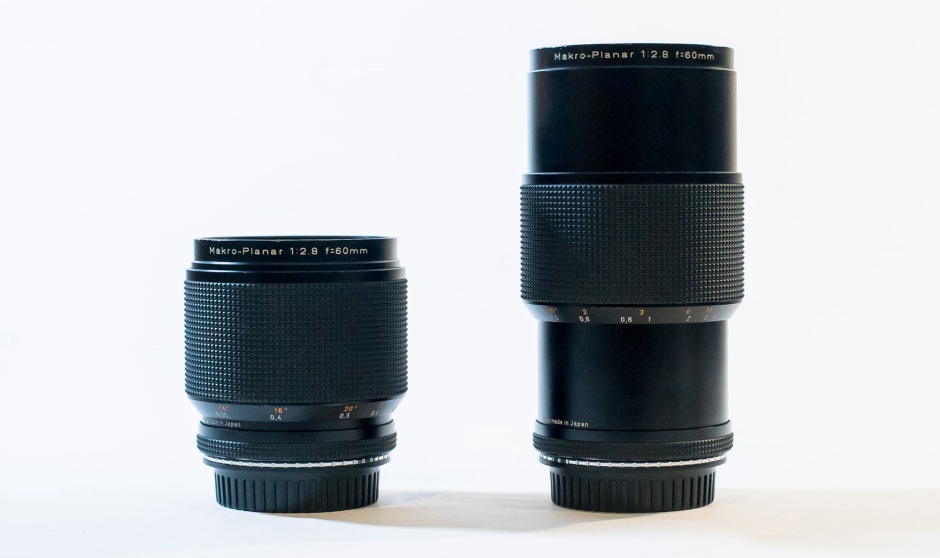
Next came the 60mm f/2.8 Macro. I almost went for the wrong one with my MM obsession! Last minute I was warned by my followers on Instagram about the edge the AE had over the MM. The 60/2.8 AE can do 1:1 magnification, while the MM can only reach 1:2. The downside of such magnification is that the focus ring travels a lot. It pretty much doubles the physical length of the lens. Because of that I had to make a super tall focus gear that would not slip off when travelling from infinity to minimum focus.
Contax Zeiss 60mm f/2.8 Macro AEG: Infinity focus on the left, minimum focus on the right
I know I stopped mentioning how sharp these lenses are, but the 60mm is worth highlighting. Yes, it’s one step slower than the its siblings, but it definitely crushes them with razor sharp focus and a beautiful transition into bokeh.
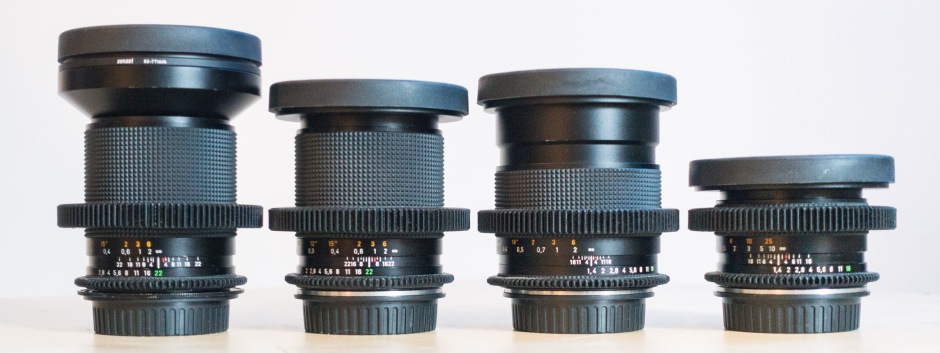
The last decision I had to make was between the 18mm f/4 and the 15mm f/3.5. I took this question to Instagram again and got really good arguments for both sides. The 18mm is almost one fourth of the price and half the weight of the 15mm, plus it fits along with the other MMJ’s in the set. At this point the price argument was adding a lot of weight. These babies were bleeding me dry.
The 15/3.5 took the cake though. 18mm is way too close to 21mm, plus lots of reviews mention its not-impressive performance. The 15mm is a gorgeous rectilinear super wide angle, it shares the same optical formula as the Leica Super-Elmar 15mm f/3.5, with different coatings. It’s also quite similar to the modern 15/2.8 ZF/ZE offered by Zeiss, just a 2/3 stops slower. It also has built-in color filters which I freaked out when I realized how to turn them. I still don’t know when to use them, though!
This wraps the first step in building a set of lenses: getting the glass. Now I’m gonna move into streamlining it for shooting and making it the best possible lenses to handle on set.
I already talked about the mount replacements and focus gears, so I’m left with standard fronts and de-clicking.
Conveniently – for me – as I was finishing the set, SIMMOD Lens came into the picture, with very competitive prices, impressive customer service and super high-quality products. I got all my standard 80mm fronts from him, as well as slip-on lens caps. For a while I didn’t understand the need for 80mm fronts, so I’ll share what I learned so others won’t live too long unknowing like me!
80mm diameter Cine rings by SIMMOD Lens and 77mm filter threads
80mm is the outside diameter of the rings, and that number is so specific because it’s a standard size for clip-on matteboxes. Since the filter threads across the set are wildly different (from 55 to 72mm), standardizing the filter threads to 77mm allows you to own one single set of filters which can quickly switch lenses without the need for tons of step rings. So all you do is get a Cine Ring with the rear thread of your lens and that’s gonna make it standard!
It looked neat, but from my experiences as 2nd Assistant Camera, I was constantly being asked how fast so-and-so lens was, or what’s its minimum focus. That information was usually written in the lens case, and the focal length was on a sticker attached to the lens cap. I was not impressed, so I decided to make my own.
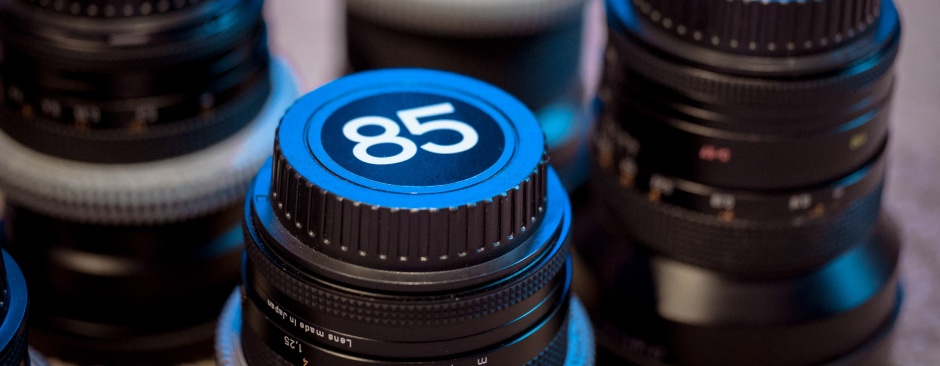
My custom made front caps with focal length, f-stop and minimum focus distance
First I measured the slip-on caps I got from SIMMOD and created a Photoshop template with that size. I plugged in the focal length in white so they’re easy to read in dark sets. Then I added the f-stop for each lens and its minimum focus in meters and feet. Lastly, I found a specialist on custom cut sticker patterns services. Then I sent that to be printed at StickerYou in vinyl stickers. Each page with eight stickers costed me about $10. You have to admit they look sexy.
The stickers were having a hard time sticking to the material of the lens caps, though. They were peeling off on their own. To fix it I first took off the stickers. Then I added a thin layer of glue, put the stickers back in place and let it all dry overnight.
I repeated the technique for the rear caps, this time with only the focal length written on them. These I ordered from MOO, because they offered me more variety at a much lower price.
Focal length marked on the rear caps as well
I read a lot of posts from people saying declicking is a super easy process on Contax Zeiss lenses, I just didn’t have the guts for it yet. I shipped all of them to SIMMOD for declicking and a quick checkup. Ron also offers the full mod service for great prices, including focus gears and lens mounts. I was just ahead of the game, so it wasn’t necessary on my case. You can use the code CINE at check out for a nifty discount!
After aperture was made smooth and clickless I still had my 3d printer hanging around. So I printed aperture gears as well. I haven’t tested these much yet, and I ended up not doing standard outside diameters. If I have a motor on the iris, it’ll have to be adjusted every time the lens is swapped.
Iris gear on the 35/1.4
This gave me a great set of lenses ready for action. All I missed was a way of getting them to said action. The only container I had so far was a Canon soft backpack. It is not a safe way to transport this grade of gear everywhere. I needed a proper case!
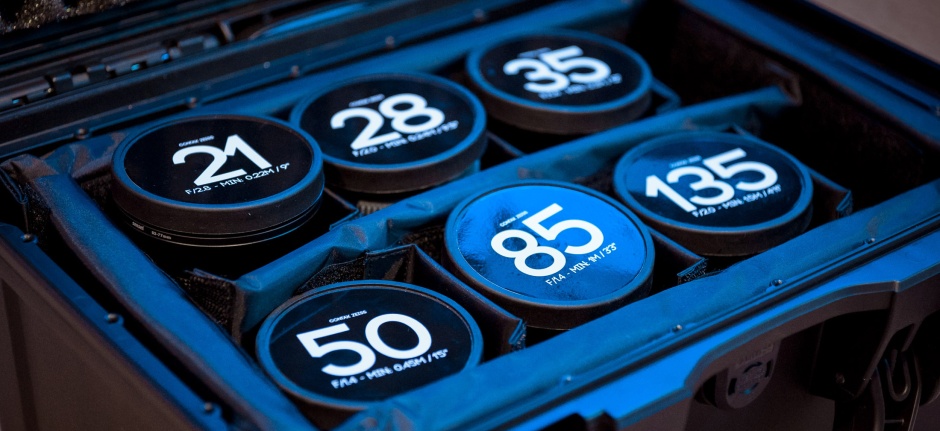
I reached out to David at Hardcases.ca and got both a Nanuk 918 with padded dividers and a Nanuk 904 with foam to fit these babies. On the 918 I keep the main six lenses of the set plus variable NDs and other filters. The two “specialty” lenses – the 15/3.5 super wide and 60/2.8 macro – go on the smaller 904 case. This makes life easier when grabbing gear to go out and renting it as well. If I know I’m not gonna need either the 15 and the 60, I just don’t take their case with me. Having them separate also gives me versatility on pricing, since the main set can still go out without them for a more accessible price.
The 6-lens set in a Nanuk 918 Case and the two specialty lenses
Building this set was a great experience throughout. I met amazing businesses with folks that really know how to deal with their customers. Trying out mindblowing glass is obvious. And all the feedback humbled me when I asked questions about what would be my best lens options. All of that in the middle of the process and posting updates of what I was working on.
Fluorescent paint to make markings easier to spot in the dark, by Moritz Schierenbeck
TL;DR
Contax Zeiss lenses are the gems for sharp yet vintage glass. They’re fully manual – focus and aperture -, have solid metal construction, long focus throw, and a great feel overall. They’re much cheaper than modern lenses, yet share similar designs and performance. They cover full frame, are super easy to adapt to many other mounts and never lose their value. You have a wide range of lenses to pick from and equally different price tags. You can either build a $1500 set or a $10000 set and you’ll always impress with the results.
They’re killer tools for video. But to achieve maximum performance, there’s a number of steps and procedures to tackle. This is a guide for people that love handling gear and tweaking little things here and there. If you want something ready to use from the get-go, I’d say this is not for you.
Lastly, just for curiosity’s sake, Carl Zeiss has a specific nomenclature for his lens designs. You can see some of them written on the ID ring of these Contax Zeiss lenses. Distagon, Planar, Sonnar, Tessar, Biogon and Hologon. Here’s a very interesting article by Edward T. that summarizes tech papers published on these designs and their differences, pros and cons.


You must be logged in to post a comment.