Fui no mercado agorinha, e tinha manga. Tem umas duas semanas, achei uma que parecia bem boa e comprei. A manga mais cara do mundo, custou três dólares. Cheguei em casa pra descascar, e quase cortei a fruta inteira antes de achar o caroço. Muito menor que qualquer manga que eu já tenha visto, mas ok. Também era bem mais seca que qualquer manga que eu já vi, mas ok. O gosto era parecido, e gosto de manga é sempre bom.
Aí tava eu no mercado, agorinha, e vi umas mangas bem vermelhas, e parecendo ótimas. Peguei uma, cheguei em casa e descasquei a parada. Sabe aquela meleira, de descascar manga, que a bicha sai escorregando e fugindo pela cozinha inteira? Então, não rolou. A manga mais seca do mundo. Na verdade, é tão louca, que é CROCANTE! Eu QUEBREI um pedaço, e faz crot-crot quando a gente mastiga. Acho um pouco estranho, mas o gosto é bom, é gosto de manga, então tá valendo! Ah, e o caroço é pequeno do mesmo jeito.
Tô começando a ficar desconfiado daquelas histórias que dizem “ah, mas as melhores frutas vão pra exportação, e as que ficam no Brasil são as ruins”. Se essas mangas aqui são as melhores que alguém tem pra exportar, eu sinceramente não quero nem saber como são as que ficam! Ou então essa história toda é uma grande balela…
Ontem a gente foi pra Surrey, filmar a segunda versão do animatic da Rityka, com o cachorro, na floresta, e tudo mais. Importante citar que anteontem nevou. Um bocado. Saí de casa às 6h20 am, tudo branco na rua, calçada escorregando, essas coisas todas. Encontrei com Sean e Daniela na Expo Line e pegamos o trem pra encontrar com a Rityka no meio do caminho. De lá, seguimos até a King George, onde pegamos um táxi até a locação. Até aí, tudo sucesso, tranquilo.
Chegamos lá, conhecemos o bróder dono do cachorro (uma criatura chamada Karma), e entramos no parque. Tava tudo branco, gelado. Temperatura ambiente: -8 graus. Preparamos as coisas pra começar, Karma ficou passeando pelos arredores enquanto a gente se posicionava, rodei o primeiro plano, um geral das árvores com a Rityka bem pequenininha, de vermelho, perdida no meio do lugar. Meus dedos começaram a doer de frio. Doer como se estivessem numa prensa. No segundo plano, comecei a passar mal e tive que me afastar pra base, e entreguei a câmera pra Dani, meio murmurando “opera aí, você sabe fazer isso”, e sentei no chão, encolhido.
Acho que nunca senti tanto frio na vida. Em um dado momento, eu só queria deitar e dormir. Aí eu fiquei preocupado. Voltamos pro carro, e ficamos lá uns minutos no aquecedor. Eu ainda tava morrendo, então o povo voltou pra filmar e eu fiquei no carro, caindo de sono e esquentando minhas mãos de todo jeito que podia. Dormi 45 minutos, que pareceram um piscar de olhos, e quando a Dani voltou com a câmera, congelando e xingando pelo frio, eu não tava vivo direito e comecei a falar com ela em português. Levou uns segundinhos até o cérebro ativar e o inglês também. Foi engraçado.
Passei esse aperto vestindo três calças, três blusas e dois casacos. Me falta gordura corporal pra sobreviver temperaturas! Depois de chegar em casa, fiquei o resto do dia encolhido na cama, produzindo e armazenando calor pra contrabalancear o frio matinal. A May voltou mais cedo da VFS, e ficamos conversando, jogando Donkey Kong e ouvindo discos. Mais uma vez, novamente, a May salvou meu dia. Não sei o que seria de mim se não tivesse ela por aqui. A saudade de casa, das pessoas, de meu pai e minha mãe tá foda, e o frio não ajuda nesse aspecto.
I thought it would take longer to write the next post, or even to rewrite and adjust the script, but life at VFS is full of surprises, right?
Made all the suggested changes, tweaked a bit of the action, made the ending a bit faster and more possible to achieve (what was I thinking when I wrote that previous version?).
It took me some time to get over the death of the silverware scene, I think that’s why it took so long to actually sit down and change this thing. Anyway, in the future, if life isn’t so hard, I might try to do it, not necessarily related to this demo reel. I’m really curious about how to pull it off.
Last week we had the mid-term presentations for our projects, when we met our mentors for the entire journey and got feedback from what we have so far. Remember when I said it was unlikely the script would go through more changes? I couldn’t have been more wrong. Before going into the feedback received, let me first get the video in this post, so you know what I’m referring to. For the color coded image on the top-right of the screen, green is live action footage, blue are CG elements and yellow is matte painting/unknown.
Brent suggested a whole bunch of changes, not only to the effects, but regarding the story as well. The nightmare-floating-silverware shot is going down, and the scene will be replaced with something related to electronic interference on the TV, computers and gadgets, which will be fun to do with a bit of nuke scripting to control the effects instead of using third party plugins. This way I’ll also have some chance to play with green screen to shoot the scenes that will fit into the TV, and some weird motion graphics for phones and computers. Not to mention some planar tracking and roto for replacing the screens.
Moving forward we get to the scene where I’m annoying May, and here I’m thinking of including some floating objects, right before we see the ship out the window. Maybe she throws something at me and the object is suspended mid-air, like a can or a pen, a small and easy to model asset, preferably. Then we go to the balcony, and the shot is broken in two parts, wide angle and zoomed in. The zoomed in might be a camera projection, so I have more control over the placement of the ships and avoid going through tracking a shaky punch in. The mothership is gonna be further in the distance and we’ll have some smaller versions of it closer to the buildings, with things coming out of them.
While watching this version of the presentation, Miles said he totally gets the characters’ feelings of “this is so awesome, but so wrong and scary at the same time!”. I think the dialogue made the story way easier to understand than the previous versions (which never made to this blog, and probably never will).
Then the characters get scared off the balcony and run to the garage. All this running is gonna be shortened, because it doesn’t add much to the story as well as it makes some people sick from all the motion and shakiness of the shots. The cuts are also gonna be adjusted so it doesn’t jump from one environment to the next and it looks like a seamless transition.
In the garage, I’ll have a silhouette moving across the light path, and for this I’m thinking of doing the same thing as the balcony zoom in, having a separate shot that blends in during the lens movement, based on a camera projection. For this one, I’ll get some extra lights to cast a real life moving shadow and have that as reference for animation and integration. A 2D alien character rig is also on my near-future plans, so I can animate it in front of a virtual light and have a decent silhouette on the ground.
Then, for the final shot, Fernão gave me a really good advice regarding realism: if the character’s girlfriend is being taken away, he wouldn’t just keep filming. A decent person would drop the camera and run towards the girl, to try and grab her! I still don’t know how to do it, but relates pretty well with Cloverfield, so, this might get even more complex.
For the final presentation, I need to have slap comps for all my VFX shots, and might as well have the final versions for all the non-vfx, storytelling shots. In the meanwhile, I still have a lot to do, such as the spaceship, a new version of the script, modeling (?) and rigging the card alien, and moving forward with my nuke scripting skills!
Not sure what the next post will contain, but let’s keep moving.
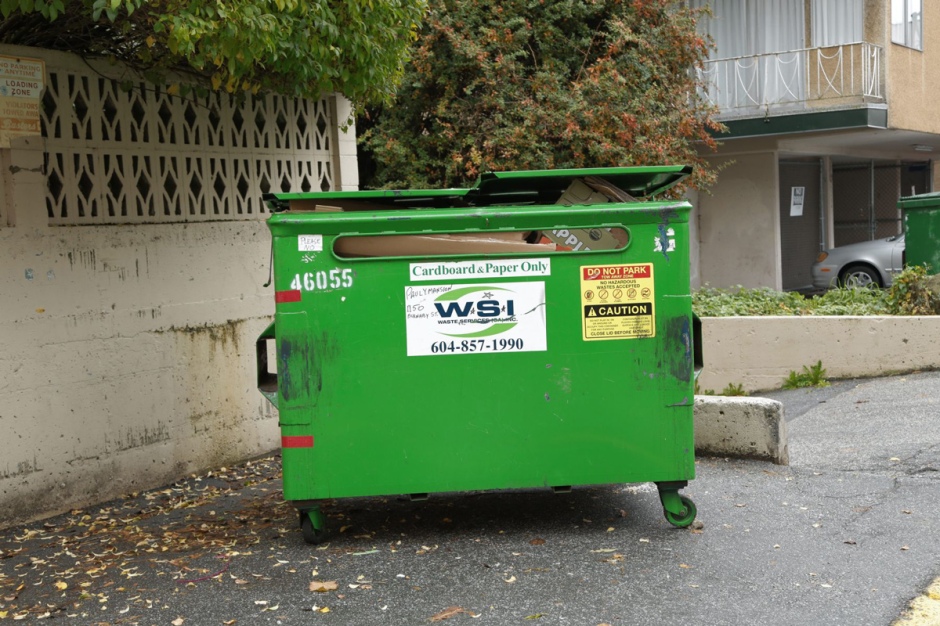
Over the last couple of weeks I’ve been working slowly on this trash bin model for the final shot of the reel. I probably could go with a camera projection, but I had nothing to do during a weekend and decided to start. Oh, yeah, it was the location scout weekend. As reference for such enterprise I took our cardboard bin down in the garage. Spent about twenty minutes measuring every little piece of it, as well as pieces of other bins I wanted to bring onto my model.
Since I was already walking around with the camera during that morning, I shot plenty of references to keep checking how things were connected, melted or bent together. The pictures were pretty useful and covered a wide array of bin variations. I think the whole model was done in a Sunday, then, during the following week I worked on the UVs and stalled a bit before got into texturing.
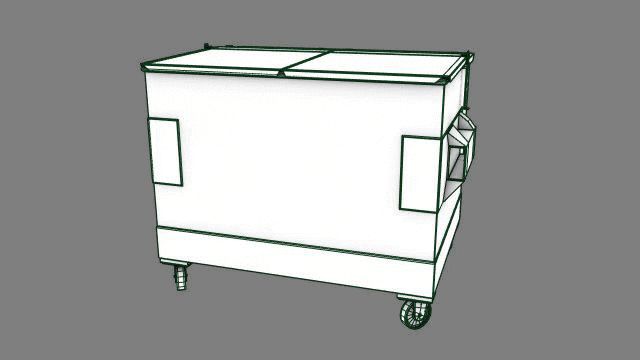
Then, last weekend I was really inspired by the latest rigging class and decided to create some controllers for this bin, so I would avoid messing up the geometry while animating. Added a controller for each lid, which only goes up so much, before the lock hits the handle on the main body. At first I tried working with utility condition nodes, ended up with too many of them for what should be a simple “if, if else, else” statement, so decided to look up some MEL and write an expression linked to the lock’s rotation. Then, I added a (useful) condition node, to evaluate its behavior before and after a certain point, paired with a couple of driven keys to avoid crashing the lock through the handle as the lid opens and closes. It’s working pretty nice. The first one took me about two hours to get working. Repeating the process was less than twenty minutes for the other side.
Now I’m struggling to make the wheels work on their own. For this task I’ve had a lot of help from Nicko, with how the code should be written and smart solutions for what should be simple. The idea is to only place translation keyframes on the main body controller and the wheels determine their direction and spinning based on that information, being physically accurate and spinning like it would in the real world. I also plan on getting a “noise” slider in there, because these things NEVER work as they should and constantly the wheel sockets start spinning like crazy. As soon as it starts working, there will be a post here, with the code too.
Yesterday I decided to start texturing it, on a first experience with Foundry’s Mari. Paul provided me with awesome tips and simple tutorials so I started early morning and was able to reach the textured result below in about five or six hours, already including bump and spec maps (which I forgot to enable on this render). The key was, before going in and painting all the details in, I went back to the garage and surrounding blocks, taking pictures of all interesting stuff and details I could find on trash bins. This helped a lot with the textures themselves, as well as the general feeling for the asset. Mari is very easy to use and I’m pretty sure I could’ve been way more efficient with more experience.
Since I’m putting this much time into a beaten up trash bin, I decided to make it my standard object to integrate in every single assignment I can.
Sorry for the heavy GIF. I’ll figure out a way to make them lighter!
Esse post tá na pasta de rascunhos há tempo demais e já passou da hora de mandar ele pro ar. Não achei direito o que era que tinha pra contar, mas vamos assim mesmo.
Semanas bem atribuladas, trabalhando em muitos assignments (graças aos céus, bem menos, em termos de volume, que no term passado), mais focados nas nossas ênfases e com um boost em liberdade criativa para grande parte deles. As aulas de VFX estão beeem divertidas, e passei a semana surtando com umas experiências de rigging e texturas, por pura curiosidade e pra gastar o tempo teoricamente livre.
Tivemos também uma introdução ao Maya Fur, que é um negócio totalmente aleatório, relativamente útil pra simular pelos ou cabelos bem curtos. Aí a experiência era colocar umas pelagens nesse camarada aí embaixo. Fur é tão doido que eu acho que simula a vida: o queixo do meu personagem tinha um buraco, onde não nascia barba nem por intervenção divina, como uma falha na barba, igual ao mundo real.
Saindo das experiências aleaórias e passando pra aulas INCRIVELMENTE INCRÍVEIS, aprendemos a lidar com RGB Lighting. Em RGB lighting você ilumina a cena usando luzes das três cores primárias, e depois controla como a luz deve ficar de fato usando o Nuke, na pós-produção, depois de renderizar tudo que o Maya tem que renderizar (geralmente essa é a parte mais demorada). Nesse assignment a gente tinha que criar duas imagens completamente diferentes usando o mesmo enquadramento e o mesmo set de luz RGB. Na primeira imagem eu só tô deixando influenciar a cena as minhas luzes que eram pintadas de vermelho, na segunda cena, tava usando só as azuis e resolvi brincar de bicho papão colocando a luz verde muito doida que sai de debaixo da cama.
Se isso ainda é muito confuso de entender, tá aqui o que era meu RGB pass, pra piorar de vez a maluquice.
Na aula seguinte, o Craig falou um bocado de integração, que pra atingir um resultado perfeito, você tem que ser capaz de recriar o mesmo cenário de luz e materiais que tinha na vida real, senão seus elementos digitais vão ficar “descolados” do resto da imagem. Esse foi moleza, fiz na aula mesmo, ajustando luzes e ambiente, fazer a bola da esquerda e a cartelinha de cores ficar praticamente idênticas às reais, que fazem parte da imagem de fundo.
Voltando pra parte mais interessante da coisa, nas aulas de Compositing e VFX a gente tá lidando bastante com matchmove e integração de elementos simples (a princípio). No primeiro vídeo, a gente tinha essa placa em branco, e cada aluno projetou sua própria placa e colocou no lugar. Enfrentamos uns processos muito loucos de tracking e coisas do Nuke que não tínhamos visto ainda. Foi uma das melhores aulas da semana passada.
Tava com uma placa totalmente sem graça, aí tirei uns minutos no fim de semana passado, inspirado pelo demo reel, e comecei a introduzir o assunto em outros assignments, com essa placa maravilhosa abaixo:
Agora sim, o vídeo com a placa no lugar:
A outra das melhores aulas da semana passada, integramos esse toldinho aí em cima da porta. Entre as mais incríveis do curso, essa também foi uma das aulas mais puxadas de todas, com MUITA coisa pra anotar, lembrar e usar em atividades futuras, ou para consulta em caso de pepino. Foi aqui que recuperei minha fé que tracking é uma coisa lógica e não mística.
Ahhh! Já tava esquecendo de registrar isso aqui também! Semana passada (ou retrasada, já não lembro), comecei um novo blog, pra documentar o processo do demo reel. É impossível escrever tudo que eu tô fazendo, senão só escrevo e não faço nada, mas tô colocando coisas lá aos poucos. Se eu tiver coragem, hoje mais tarde ou amanhã cedo coloco um post sobre a mid-term presentation. O link é Hovering Lights, mas o endereço é o antigo tferradans.com/portfolio, depois dá uma passada lá, que tá ficando bonitinho (e bem técnico, como eu gosto).
Bom, agora que eu acabei (cortei no meio) a parte dos assignments, vamos para o Brasil. LITERALMENTE!
A gente tinha pensado em ir pra Los Angeles, Las Vegas, San Francisco, mas a saudade tá mais forte que a sede de explorar novos lugares, e vamos fazer uma retirada estratégica, partindo de Vancouver no dia 19 e chegando em São Paulo dia 20! Aí a May vai pra São Bernardo e eu vou pra Salvador, para passarmos Natais (Natal tem plural?) em família, e depois nos reencontramos em São Paulo para ver amigos e atividades diversas!
A gente já tinha as passagens, “só” tivemos que alterar as datas. Foi um dia tenso. Todo o tempo que economizei ao telefone ao longo desses últimos… dez anos, eu diria, gastei numa manhã só, em duas ligações de quarenta e cinco minutos cada uma, sendo que trinta desses foram ouvindo musiquinha de espera. Sério, o atendimento telefônico da Air Canada é tão congestionado que eu telefonei, fiquei com o telefone no ouvido, saí de casa, fui até a Future Shop (quinze quadras de distância daqui de casa), procurar e comprar jogos novos (foi no dia do lançamento de Far Cry 4 e GTA V para o PS4, então não podia perder a ocasião), voltar, passar no mercado, e sentar na mesa em casa de novo, pra poder terminar de falar com a atendente. Pelo lado positivo, as moças foram muuuito gente boa, proativas e conseguiram até colocar a gente em poltronas lado a lado num vôo lotado!
Agora, pra fechar o post, chegamos no Buda, que é uma referência ao disco novo do Criolo, Convoque seu Buda, que a May me mostrou na semana retrasada e ouvi direto, sem parar e sem pular músicas por quase dez dias seguidos. É sen-sa-ci-o-nal, tem muita cara de São Paulo, e traz nas letras temas mais do que relevantes pro momento atual, ecoando muita coisa que a gente vê, ouve e sabe. Vou parar de falar do disco senão vou falar besteira, porque não é minha área de expertise, mas recomendo ir no link e baixar, que é de graça, ou pelo menos ouvir uma vez pelo streaming, se não puder/quiser baixar.
I was about to write this huge and complicated post explaining how I’d shoot my footage RAW with a 5D MkIII running Magic Lantern, but the guys at Cinema 5D did several posts regarding that workflow, and google or the Magic Lantern forum can help filling in whatever blanks you end up having while reading their articles, so I’ll just focus on the creative and technical reasons why I’m choosing to shoot with a DSLR instead of VFS’ Sony EX-1.
I’ve been photographing using DSLRs for about six years now, shooting video for four and raw video since it was beta testing (roughly one year ago), so, I’m kind of used to the benefits (as well as the quirks) of working with DSLRs. It’s not a quick thing, grab the camera and go shoot, takes some time to get used to its weight, focusing (which is always a tricky exercise) and fighting against rolling shutter, which can ruin great takes.
Anyway, let’s get to the point: I’m shooting in low light (take into account the time of day I’m shooting and the internal environments as well), with little to none extra lights, so the full frame sensor is a huge boost. Add that to how well the 5D3 handles high ISOs and we’re on a good track. This “extra” light will be useful to increase my shutter speed and help with tracking, getting rid of some unnecessary motion blur. Ok, these would be good reasons to weight the 5D3 against the EX-1, but Magic Lantern’s RAW capabilities make the choice really simple.
Now, back to the good (and dangerous) stuff: with fast enough CF cards I can shoot around 20-25 seconds of 1920×1280 resolution, which is a bit larger than regular HD footage and provides me extra margin for cropping, reframing, place tracking markers and, if nothing else, extra bits and pieces of footage. If I want a continuous shot, I can go down to 1920×1152 and don’t worry about frame skipping at all. That would be just for safety: I don’t think I have any shots that run even 20 seconds long. These ‘short’ 25 seconds create files close to 4GB. This gives you an idea of how heavy these things will go in post.
In terms of metadata, the guys at Magic Lantern are really doing wonders with their file format. It stores EVERY SINGLE PIECE OF METADATA that a regular photo would (and regular video wouldn’t). Shutter, iris, ISO, WB, frame rate, resolution, focal length and focus distance. The awesome thing about the last two is if you change them, during the shot, the change is recorded. Let’s say I do a zoom in in the middle of my balcony shot. The MLV file will store how long my zoom was, and both my initial and final focal lenghts. No need to say these features only work with Canon EF lenses. Manual lenses don’t provide that kind of information to the camera body.
After shooting, the fun begins. From the MLV files I can render out rough proxies (for general editing) as well as Cinema DNG 14bit frames that can be processed by Adobe Camera Raw or any other similar programs for huge adjustments. From those DNGs I’ll render out two “default” passes for each shot, one with extra contrast and sharpness, to be used for tracking, and a very neutral and flat pass for the final compositing and grading.
Last year, when we shot Zona SSP, RAW recording was wild, we had no sound, and very likely to find green or pink messed up frames among the good ones, what could, very likely, ruin your shot. Even though, things turned out good. Now the MLV file format is capable of embedding sound (which avoided me some nightmares) to the recorded videos, and we do have decent real-time players for the files too. The previous workflow required everything to be converted and proxied BEFORE you could watch any of the footage. Let’s say it wasn’t the most comfortable thing to be completely in the dark about what you just shot. Checking the footage is much easier now, thanks to MLRawViewer.
For testing purposes (since I’m not just gonna wake up one day and go out to shoot my raw demo reel), I’m doing all the assignments from now on that require live footage this way. It’s my way of bulletproofing the workflow and make sure I won’t make any stupid mistakes when the shooting day comes.


You must be logged in to post a comment.