
We heard, numerous times, this assignment would be hell, that nothing works and people go crazy over it. I think no one is going crazy in our class. Tracking was hard, that’s for sure, but after that, it was all fun and this is what I’m writing about in this post. Seriously, this has been the coolest assignment so far for a couple reasons, specially a great deal of freedom to play, instead of following specific in-class steps.
Here’s my final version, and below it I’ll break down my tree and go over some tricks I tried and worked well for this (and Sean got them all, I think!). Since the video is quite small, be sure to check the 480p youtube option.
Now, Nuke.
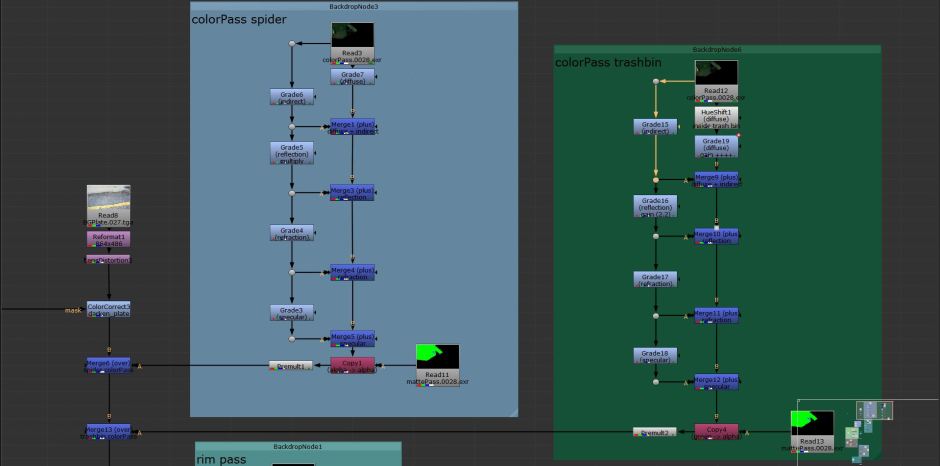
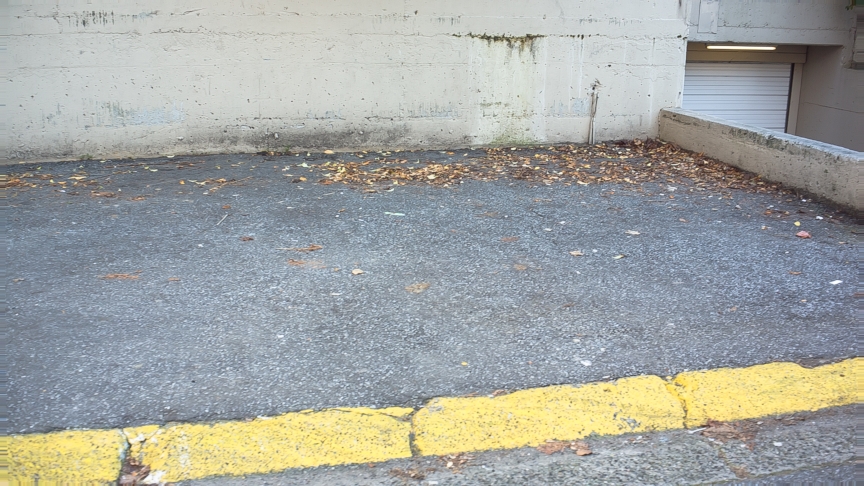
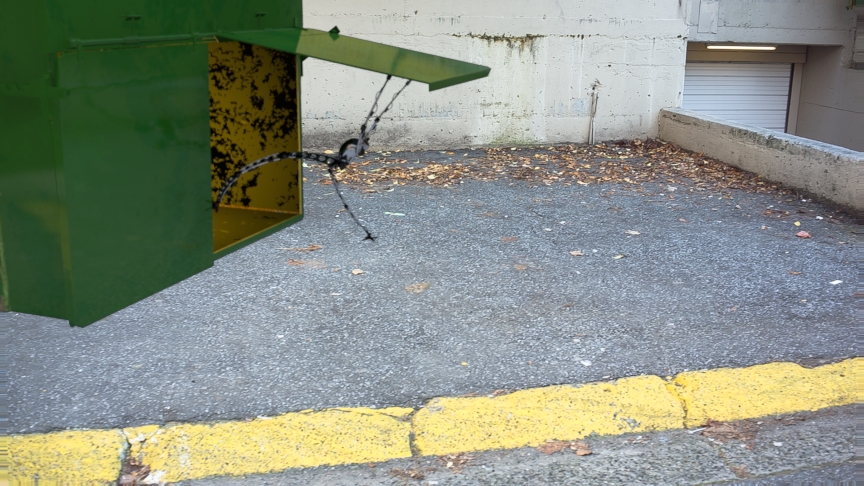
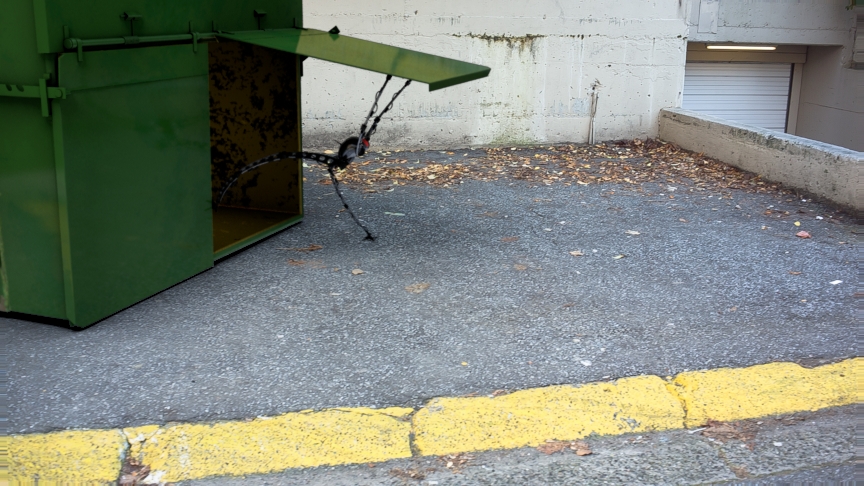
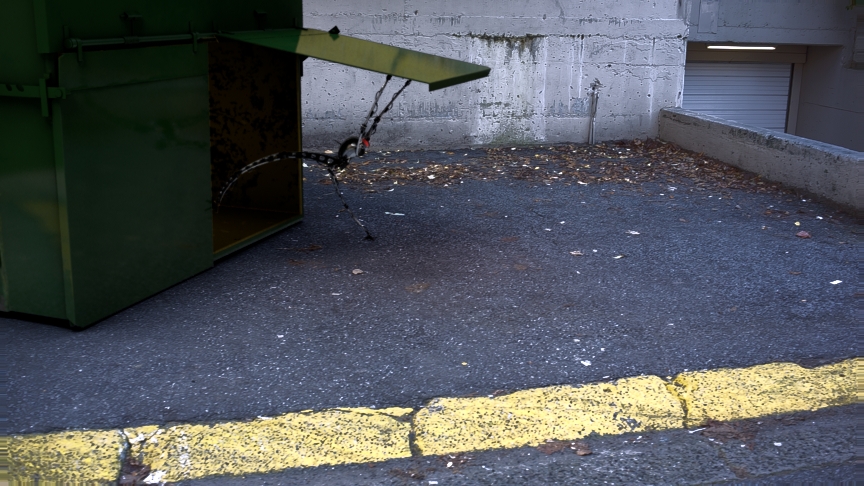
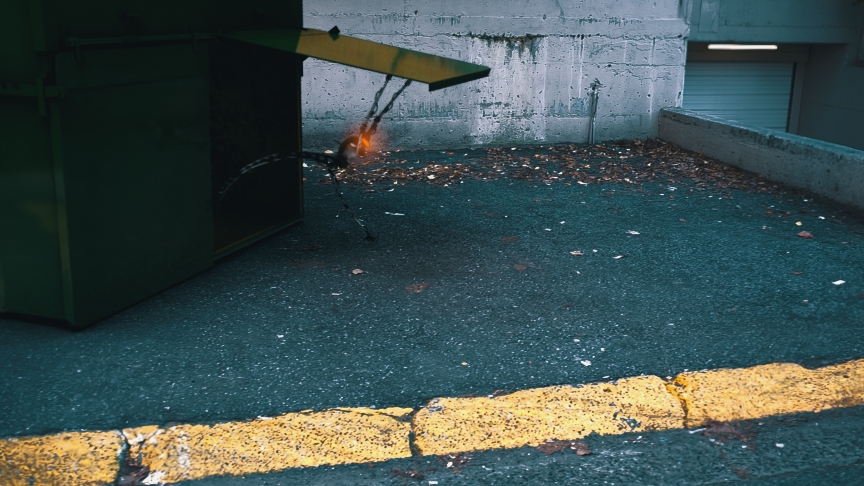
I started with my plate, shot right outside my building’s garage. From day one I wanted to have a trashbin there for the spider to interact with, so I started modeling weeks ago, so it would be finished on time to be a part of this. More on the trash bin here. My first shots were bad and too shaky, so I ended up reshooting, with the glidecam and higher shutter speeds instead of my default “handheld 1/48th of second shutter”.
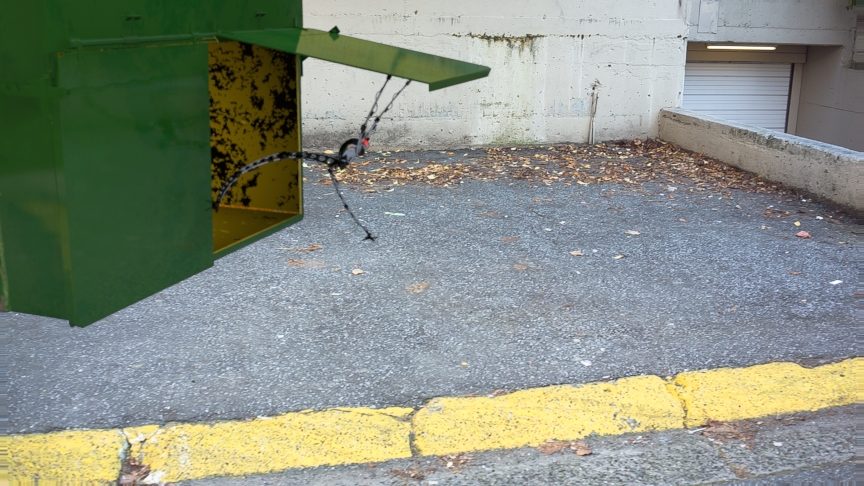
Reformat, to bring it down from 1080p to our standard VFS size and Lens Distortion so it matches the spider renders coming out of Maya. I’ll ignore this Color Correct “Darken Plate” for now and come back to it a couple lines ahead.
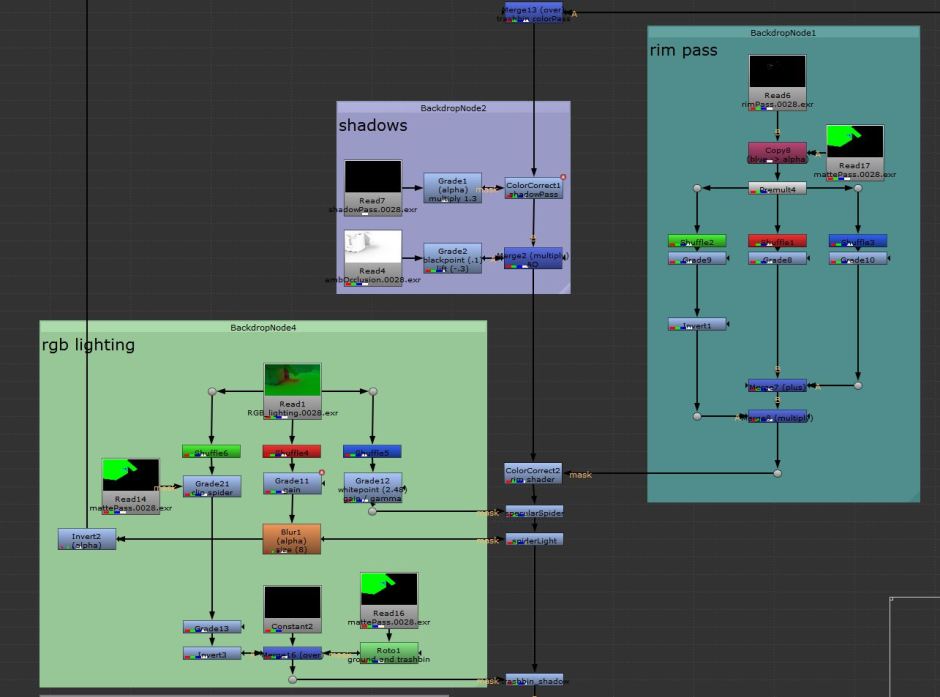
I had two color passes grading branches because the spider and the trashbin are both in the same image, but I wanted different values for each pass for each separate elements. Grading went as it should, and in the end the matte pass defines what is going to be merged onto the main pipe (spider first, then trash bin).
As most of the lighting was coming off the IBL, I just added a small volume light inside the bin so I could bring back some of the inside texture and avoid having pitch black interior, specially because the spider is in there at the beginning, and the robot casts some light! (Thanks, Cameron, for the hint of animating these grade nodes)
The indirect pass has most of the light information. The IBL was created from a chromeball, shot along with the plate. It was weirdly blue and I had to go and fix it in photoshop before the final renders. Not sure if it’s always like this (other classmates told me they had the same issue with a strong blue cast).

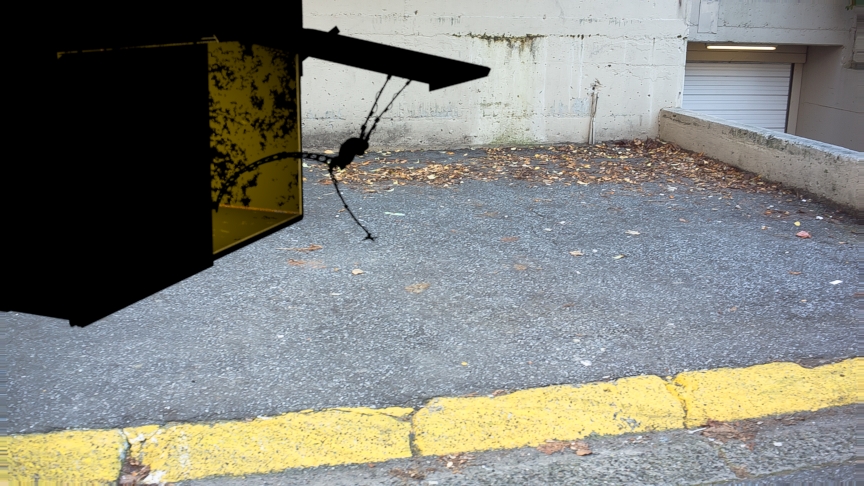
The spider has an almost fully reflective material, so it’s still mainly black so far.
For the reflections, even though I had the IBL and the results were ok, I was pretty sad because the ground was so close to her and the reflection didn’t match so well. What I did to fix this issue was, since my tracking matched the footage from start to finish, I camera projected the plate onto the proxy geometry of the environment and disabled its primary visibility for this pass. This got me perfect reflections from the ground as the spider moves anywhere. The top reflections from the IBL were already good enough.
The refraction just added the spider’s eye, that has some glass in front of it. Nothing too fancy. If I had a close up, you could notice the nice bump it has. No need for it here.
Since the IBL doesn’t cast spec highlights, I added a strong directional light where the sun is positioned and this gave me good highlights on the spider and very subtle details for the trash bin.

Now the main elements are already comped together and we just have to go through integrating them better.
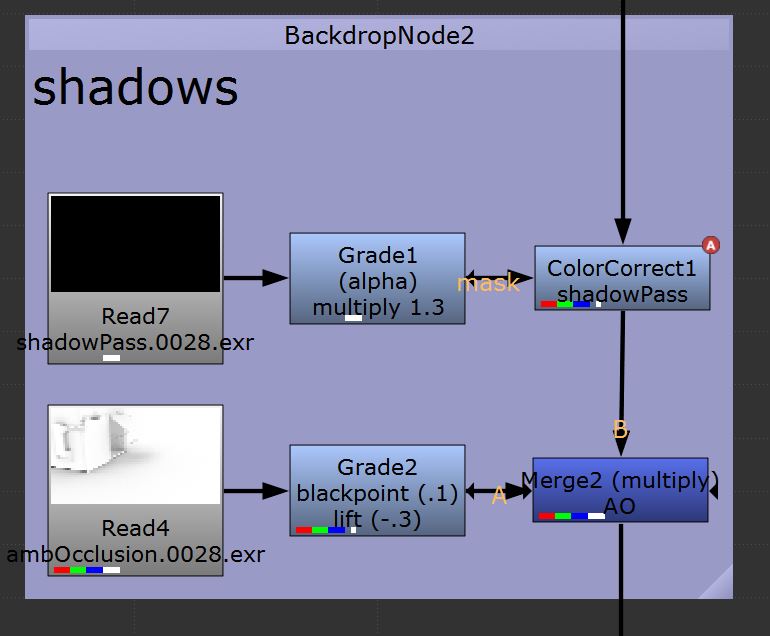
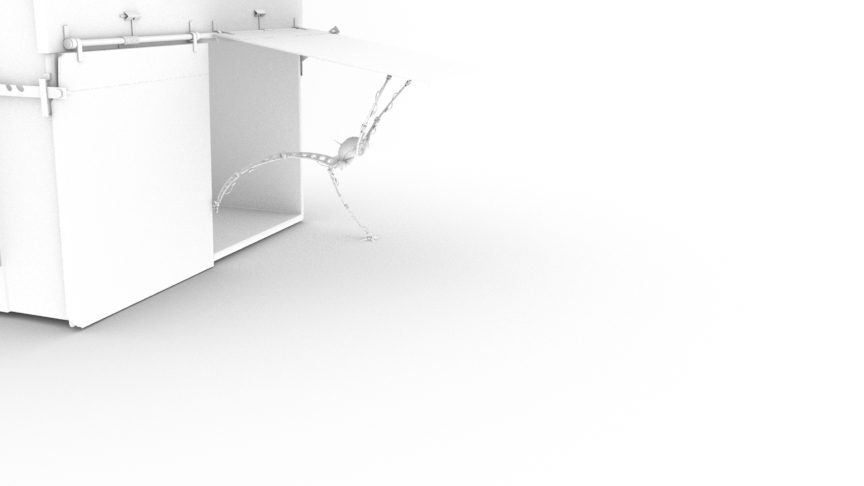
Bringing in the shadows! Here I had to do some tweaking because if I had my shadowcasting light where the sun was, on the IBL, the image looked WAY TOO FLAT and fake. As the sun isn’t directly visible on the chromeball, I just moved it on an angle and softened it a lot, so it would feel like it’s light bouncing off a wall and with an “indirect” feel to it.
I’m still not happy with this shadow result, so I’ll play some more with it ahead, on the RGB light pass, for now, let’s just keep moving onto the ambient occlusion pass. For this I talked a bit with Petar because the proxy environment is required in the pass, otherwise we wouldn’t have the spider and trash bin’s contact points with the ground plane/wall, but if the proxy environment is part of the pass, it occludes itself and doubles the shadows that already occur in the real world. In order to solve this issue, Petar contacted Craig, who provided us with a nice custom attribute for polygons and the mib_amb_occlusion node in Maya, the inclexcl and nonself attributes. They allow you to define which piece of geo occludes itself or just others. As I’m sure Craig doesn’t like his class materials going online for free, here’s an alternate explanation for this method.
Here’s the AO pass without the proxy environment occluding itself.
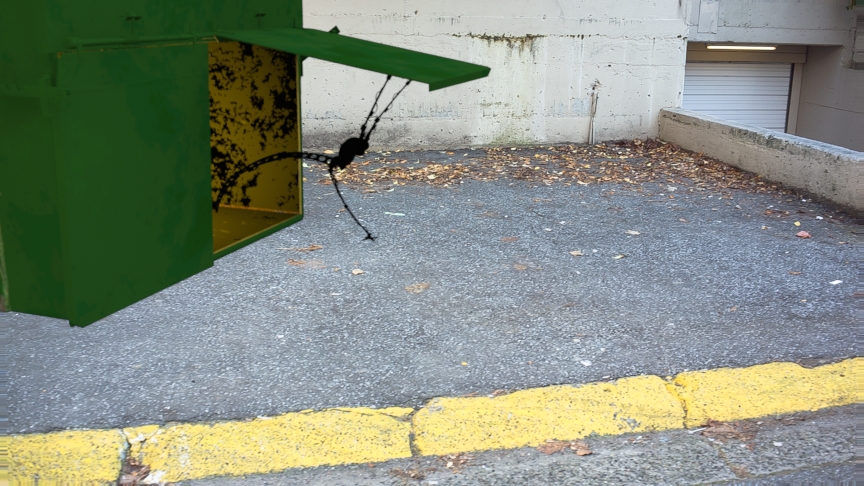
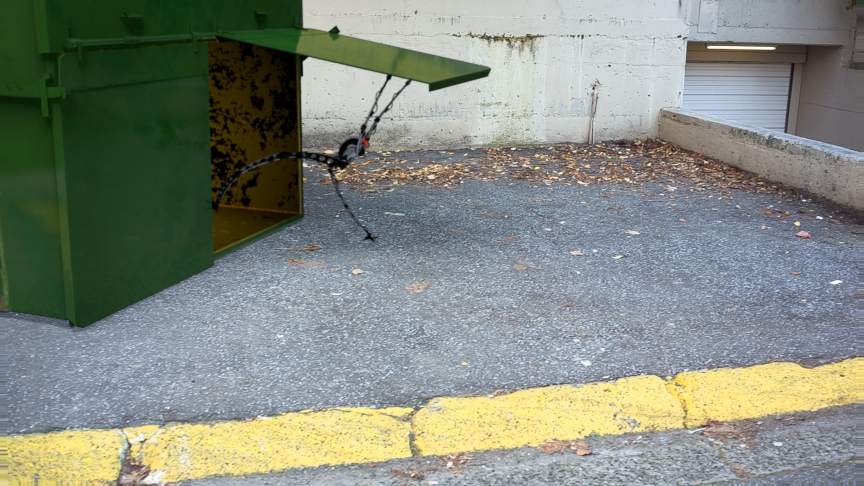
And that multiplied into the main data pipe. This really brings the image together and sticks the spider and the bin to the ground. It also kills a lot of that strong and weird inside of the bin, as expected.
This concludes my shadow renders and moves us forward to the RGB passes which are amazing for great changes very quickly.
I won’t go over the rim pass because it’s just a material assigned to the spider and, on this specific frame, it makes almost no difference. Over the course of the animation, it reinforces the shape and reflectivity of the robot in a very (VERY) subtle way. I like it and I think it works pretty well (and it’s a quick render, so I didn’t die to have it here).
I forgot to add the bin to this pass, so the RGB matte was also useful in cutting off the claws that are under the metal lid. They were shining through it almost until my last render, when I was putting the breakdowns together and noticed the error.

There were a couple things I wanted to achieve right off the bat with my RGB lighting pass. Three things, actually, which is quite convenient, since I had three colors for it.
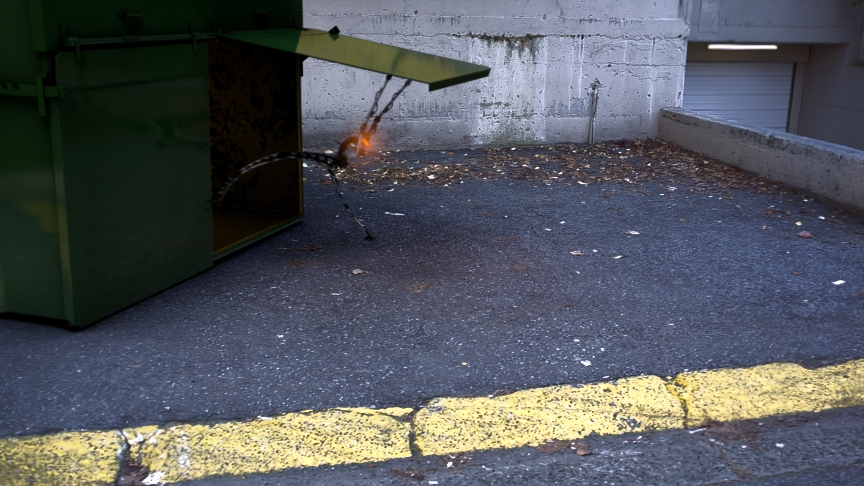
The first thing was to create the spider’s light, coming out of its eye. This is a particularly bad frame to show this, since most of it is hitting the inside of the lid and bouncing back to the ground, but over the animation is pretty easy to see the result. I used a red spotlight, constrained to the main body control, with quadratic falloff so I could make it stronger or softer using the gamma slider in Nuke.
The second thing was a better control of the specular highlights. Blue channel for this, also very subtle but effective.
Third objective, that shadow improvement I mentioned earlier. I used the inverse of my green channel. The green is a directional light casting soft shadows on the ground from both trash bin and spider. The bad side of it, as you may notice, is it casts shadows on the back wall as well, not just on the floor. For this one to work, I used the green from my matte pass merged with a poorly animated roto (10 keyframes total) that covers only the ground plane.
Each of these separate channels go as alpha masks into their own Color Correct nodes. Also, the inverse of the spider beam (that Inverse node on the left) goes up into the “Darken Plate” we saw back there, making the whole plate… darker, except for what’s in the mask. This created an interesting lens-looking effect where the orange colored beam fades off to a light toned blue on the background right on the edge before going dark. Makes sense? Kind of hard to translate but easy to see in the video.
Now most of the work is done and we just need a couple final adjustments and passes.
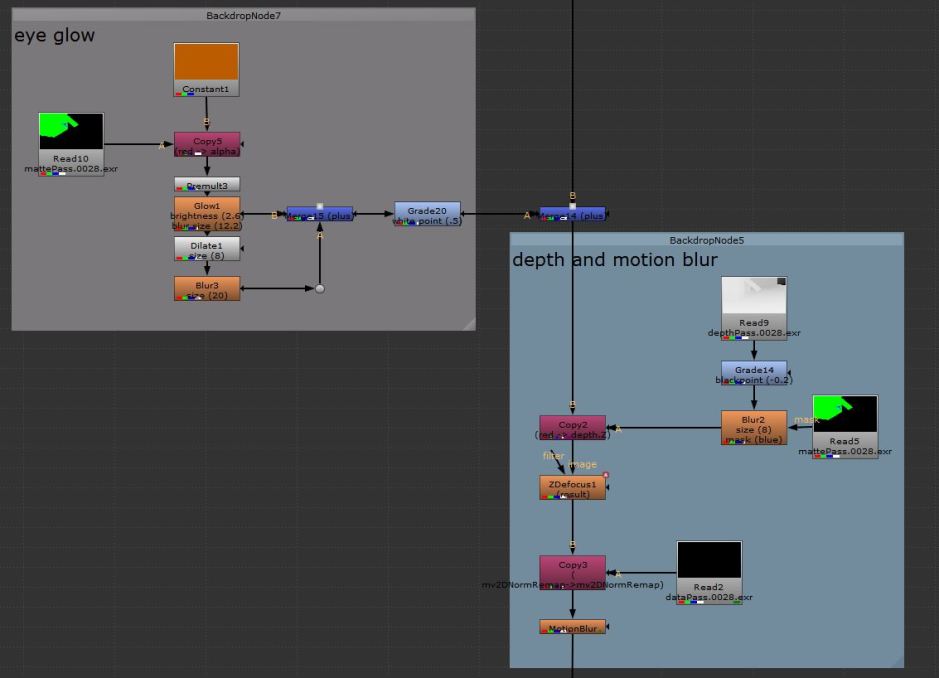
First of them, adding glow to the spider’s eye. Using the matte pass, the eye is the only element with a red shader, so I shuffled it out onto a Constant, which allows me to choose the color for the glow (a bright orange this time). The Dilate and Blur nodes below the Glow are there to create a larger halo around the main light. Since it’s mostly visible in the beginning of the animation, I wanted it to make a good impression. Also (but obvious), since this is light information, it’s merged as a plus onto the main pipe.

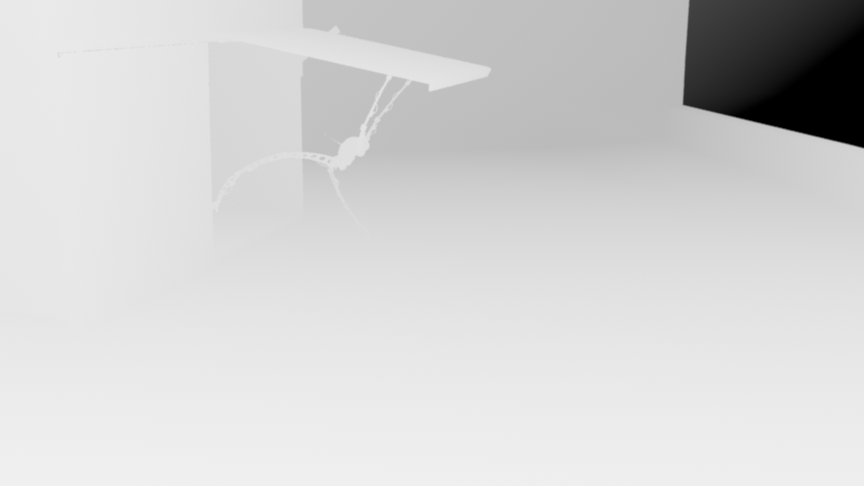
For the depth pass I ended up adding the proxy geometry too, because I wanted my Nuke defocus to affect the original footage as well, not only the spider (which would’ve been quite weird). A small transition between the ledge on the right and the garage gate doesn’t match perfectly, so the Blur to this pass aims to hide this flaw. It would make the spider blurry too, but again I used the RGB matte pass to make sure the blur doesn’t affect our main character. Also, since this is an RGB channel, I had to use a Copy node to throw one of the channels into the Z.depth channel of the main data pipe, so ZDefocus could use it.
I feel this is the first time, since I discovered the ZDefocus node, that I’m NOT going too strong with it! Check the fluorescent lamp at the gate to see exactly what this is doing. It’s also affecting some of the foreground, but youtube compression is destroying that altogether.

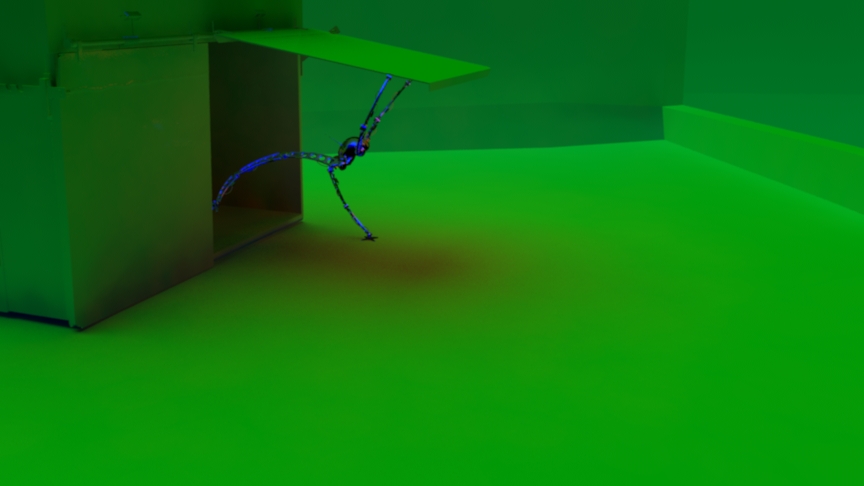
One quick break before the motion blur: I’ve wrote about a lot of uses of this RGB matte pass but haven’t showed it yet, so here’s how it looks. It provides me with quick and different alpha channels within the same image based on the three colors, to control specific effects (mostly masks, I must add).

Back to the motion blur: this is a pass I’m not totally acquainted yet, it’s the first time we actually use it on an assignment on our own. I know it enough to make it work but every once in a while it breaks and affects the background, or doesn’t work at all, so more testing is required. Maya is outputting 2D motion vectors created by interpolating between each two frames. Since we knew from the beginning this pass would be used, we had to set ON for the Force Motion Vector Computation in the Performance tab of the Render Settings, otherwise our alpha channels would be all messed up, and most of the render passes wouldn’t align well with this data pass. In Nuke, the Copy node is getting this information and copying it into the mv2DNormRemap channel, which is used by the Motion Vector node (which is also very mysterious and works like witchcraft).

I had to take out the environment from this pass, otherwise I’d have double motion blur on the background, the real one, from the footage and the digital, created by Maya.
Finally, the final steps of the process, I have all this normal data and world position passes coming out of Maya in case I needed to relight anything inside of Nuke, but that wasn’t really necessary. It’s still here in case I decide to use it for quick fixes.

After that we bring back the Lens Distortion, taking the plate back to its original state and distorting all the rectilinear CG elements as a lens would do in real life.
I took a couple hours this week to clean my hard drive and found some files I had forgotten that were here, including a bunch of Vision Color’s top notch LUTs. This weird, fully black node is actually a Vectorfield node, which reads 3D LUTs and applies them to the image, as a color correct. I won’t go into what LUTs are or do, because I’m not sure of how to even start writing about this.
The trick here is you have to set your input and output colorspaces, otherwise it leads to odd-looking results instead of cool cinematic images. This was also interesting because it adds to the tools I can use to create the look of my demo reel, but this post is long enough I won’t write any further. I still have to experiment converting my footage to LOG, instead of eyeballing it, like I did this time.
Workflow development is another boring thing I really enjoy doing and testing.
Ok, I lied. Just a couple more lines: thanks to Miles, who made tracking possible (hahaha), Selman, who encouraged me to fix my jump animation instead of just ditching it because I already had the required number of frames, Cameron and Petar, both made very specific light-related comments that added a lot to the level of realism of the images and Daniela, Luka and Sean for pointing out a horrible sliding issue that was occurring in the previous versions. That’s it. Over.