Here’s an upgraded version for the anamorphic mumps correction tutorial I posted last year. Featuring a free AE preset that will let you apply the adjustment directly to video! I made this episode in collaboration with Lucas Pfaff.
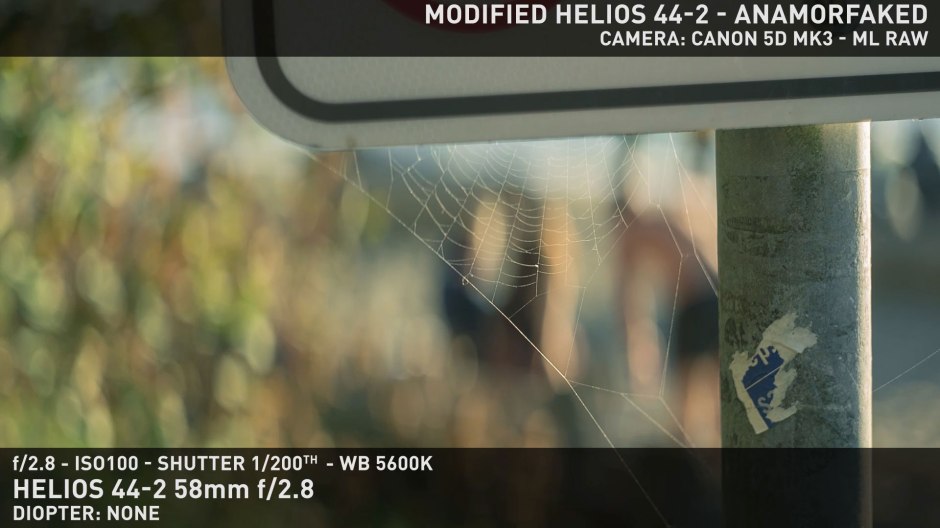
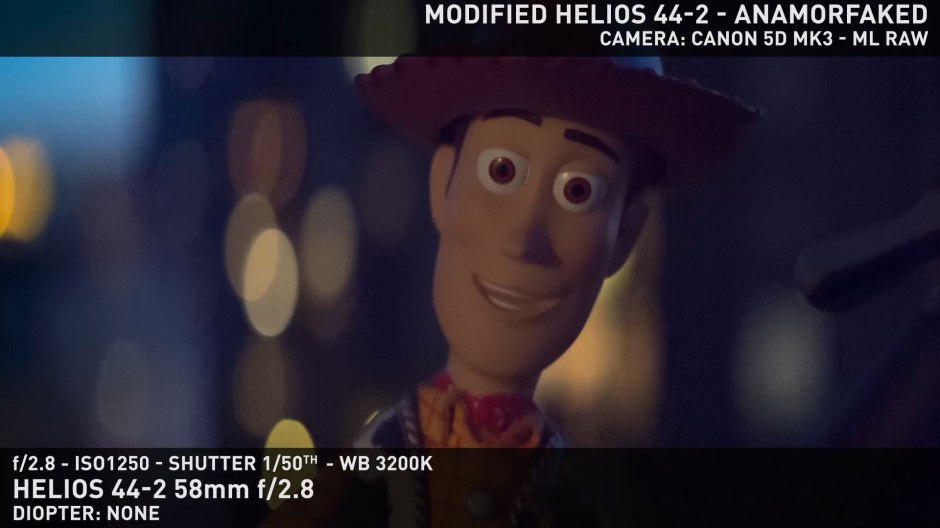
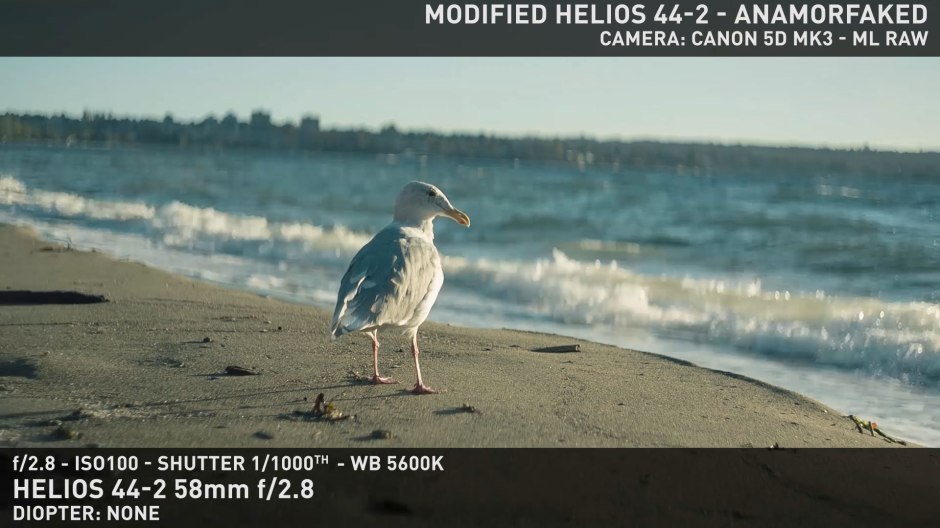
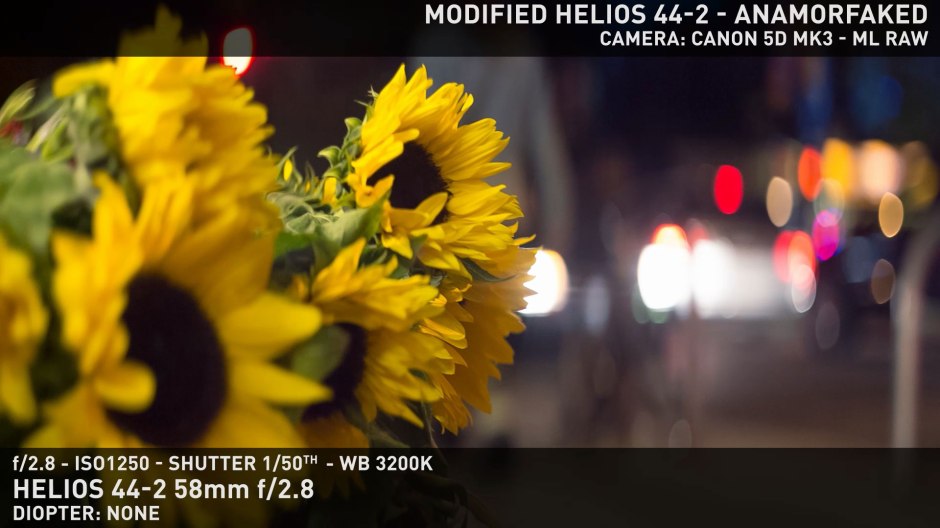
Anamorfake your Helios 44 by opening it up and using an oval aperture. Anamorphic bokeh made easy and with very little cost! All steps explained and links provided at the blog.
All the RED links on this post are part of eBay’s Partner Network, so if you purchase anything through them, you’re helping me to keep this project going.
Tito Ferradans here for a shorter than expected Anamorphic Chop Shop episode. I expected this whole thing to be a little more complicated. Thankfully I was wrong. Cutting to the chase, in this episode I’m gonna show you how to open up the Helios 44-2 in a non-destructive way and use your own aperture discs. Before I start on the procedure itself, this technique was first shown as a vimeo video by Amir Safari, in late 2012. I messaged him about it and we talked a lot, he explained me how to open up the lens and even sent me some of his spare aperture discs through the mail since I couldn’t make mine anywhere in Brazil. Amir is still doing aperture modifications to some other lenses and if you like what you see here, you should definitely check his Train Station test video – you can find the link in the blog post.
First thing you should do is print out your aperture. I have links for 2x ovals and different iris values (f/2.8, f/4, f/5.6 and f/8), you can just download them and get them laser cut. Here in Vancouver I just went to Laser Cutter Cafe and that costed me less than CAD$10. You can also design your own aperture blades, as crazy as you want them, feel free, be creative. Another option is to use transparent sheets of plastic and color them using markers. Just a hint of how crazy things can get.
UPDATE – OCTOBER 2016: I’m selling aperture discs for this mod on a small scale on eBay, so if you’re looking to get some for a decent price, check out the listing!
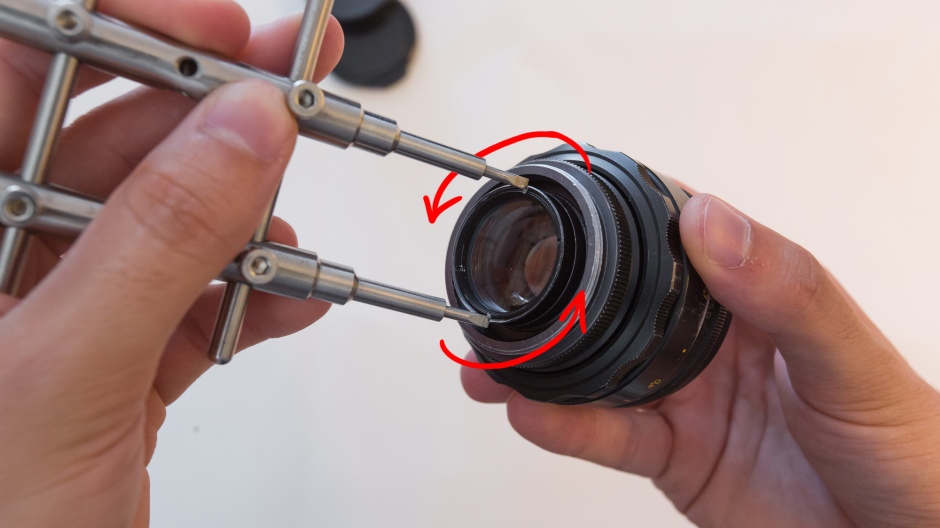
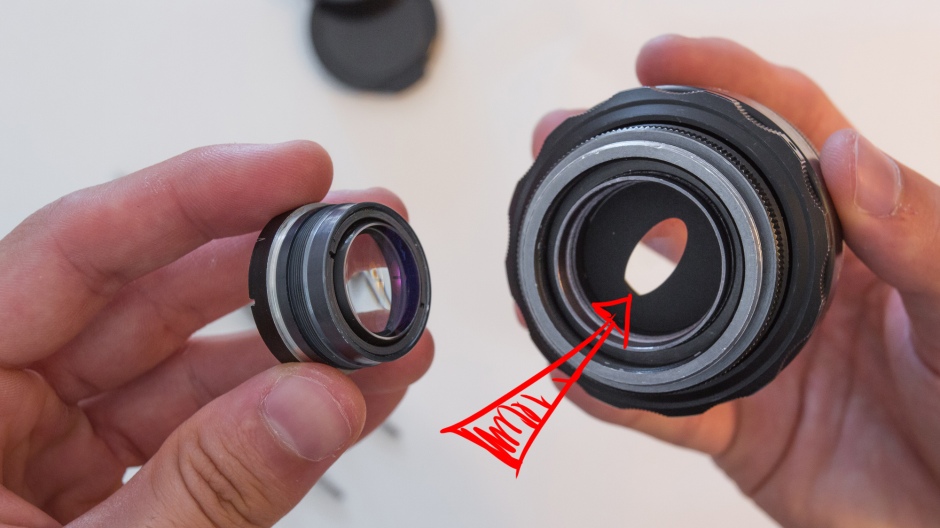
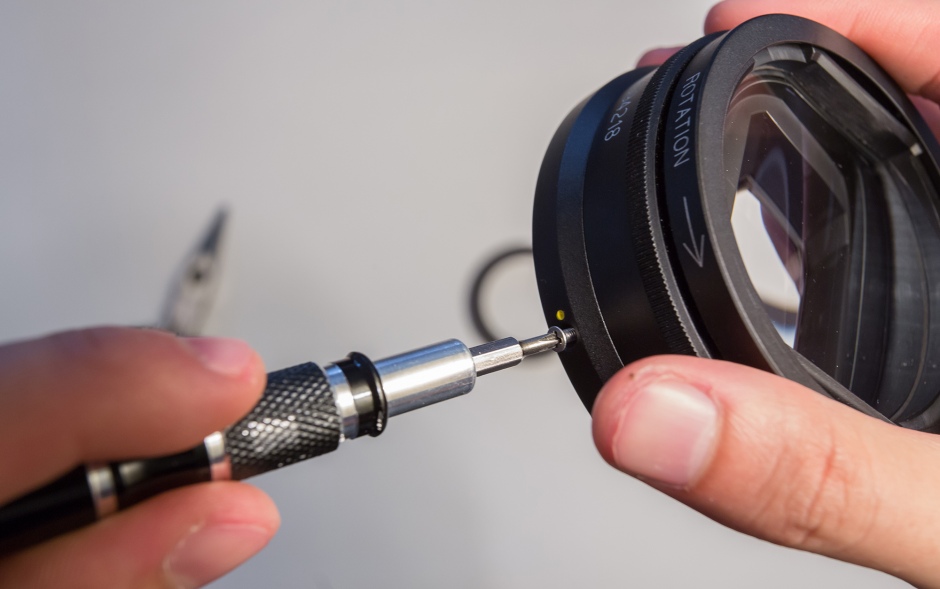
Next step is opening up the lens. The first time I did this mod, I came through the front and had a ton of extra work and even messed up the focus helicoid. Ended up damaging the blades and having a stuck iris. If you open it from the back, you’ll have to put a little strength once but then it’ll be as easy as attaching filters. I’m using a lens wrench (less than $15) just to make life easier. You can see there are two different slots for the wrench, you need to pick the outermost one, which is liked to this thicker piece.
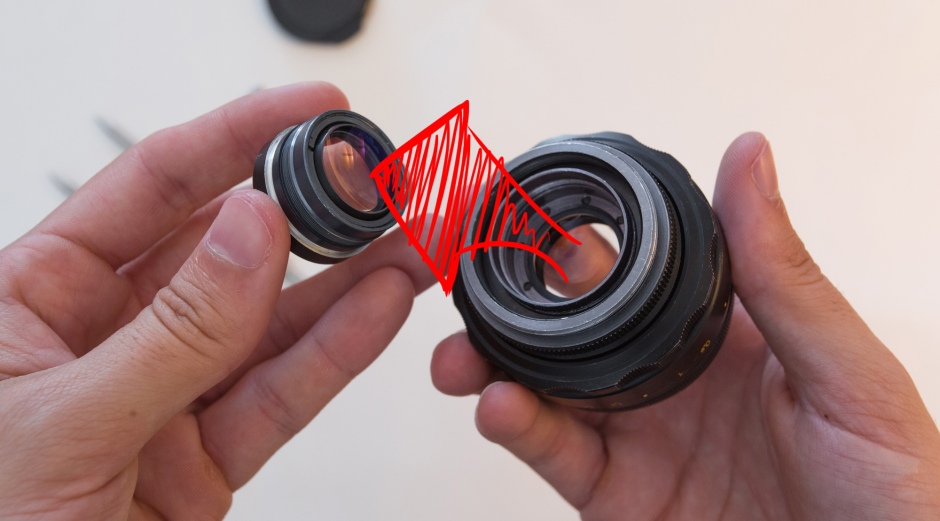
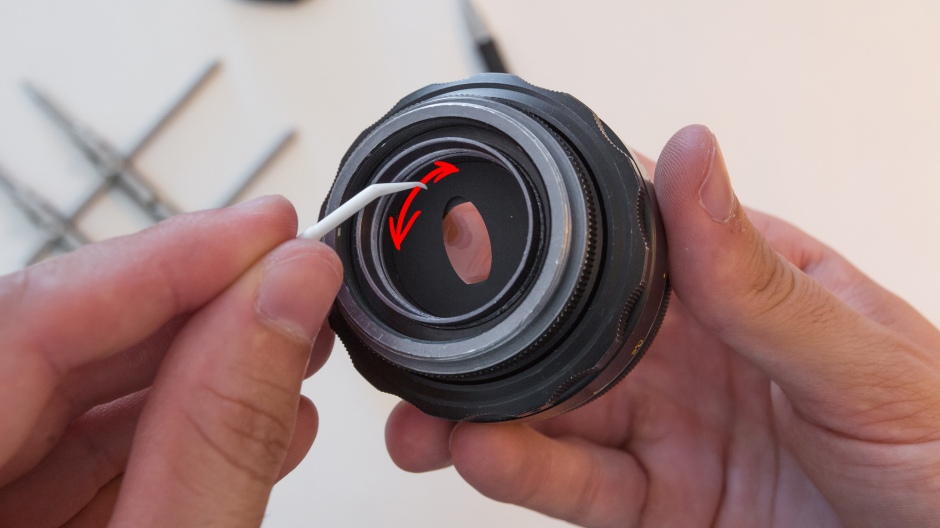
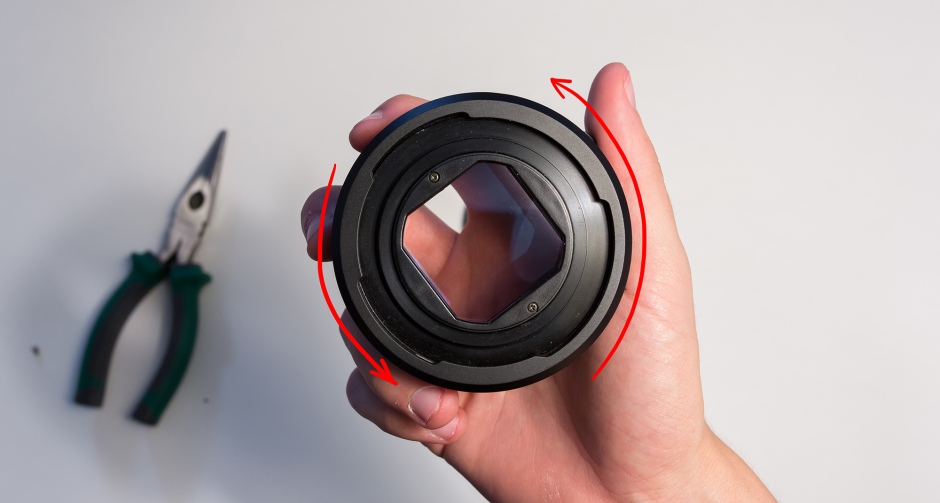
So, twist the wrench anti-clockwise (I always get this wrong) and remove the rear optics. Now you’re looking at the iris mechanism. Just drop your selected aperture there and close it up again. One issue you might face is getting alignment right, which can be a little tricky. In my case, I did a tiny mark on the side of the lens that’s facing up, and then using a toothpick I aligned the oval with that mark and then closed the lens back.
I hope you guys enjoyed this video, subscribe to the channel for more content, check my blog for some extra information regarding this mod and other anamorphic matters. Also, if you know of anyone who’d be interested in this modification, send the video their way. I’m trying to constantly upload new stuff, but your help spreading the word is a huge boost for my morale along the bleak fall and winter months I have ahead! Thanks for watching, and I’ll see you soon! Ferradans out.
All the RED links on this post are part of eBay’s Partner Network, so if you purchase anything through them, you’re helping me to keep this project going.
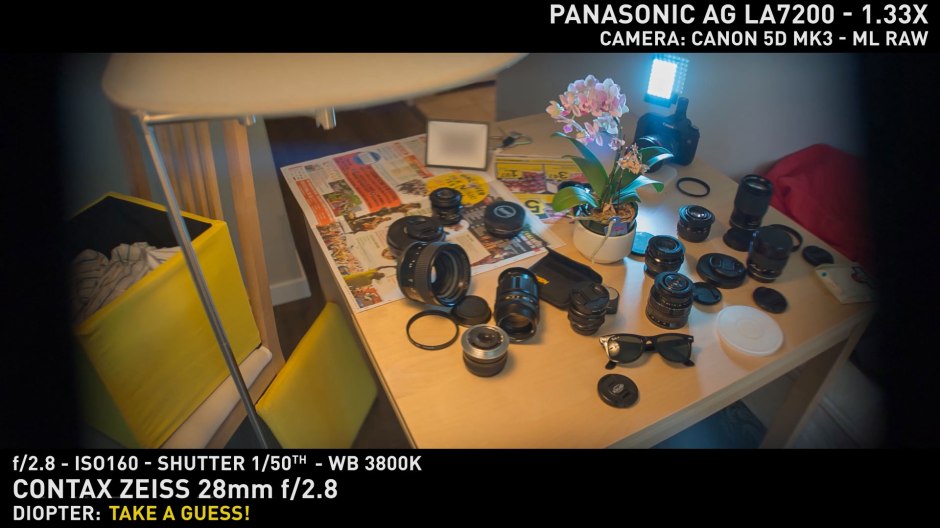
Hey guys, welcome back to our Anamorphic Chop Shop, I’m Tito Ferradans and in this episode we’re going back to what I presented last week, about Mark’s video on fixing the Panasonic’s issues with chromatic aberration around the edges, close focus and lowlight performance thanks to a +0.25 diopter. Once again, thanks to Rob Bannister at Creative Camera Rentals – my associate, look how fancy I’m getting! – and Gearhouse Camera Rentals for providing the gear for this video. Thank you all for the comments, some people did pretty good on the guessing and explanation!
Test Video with all specs revealed!
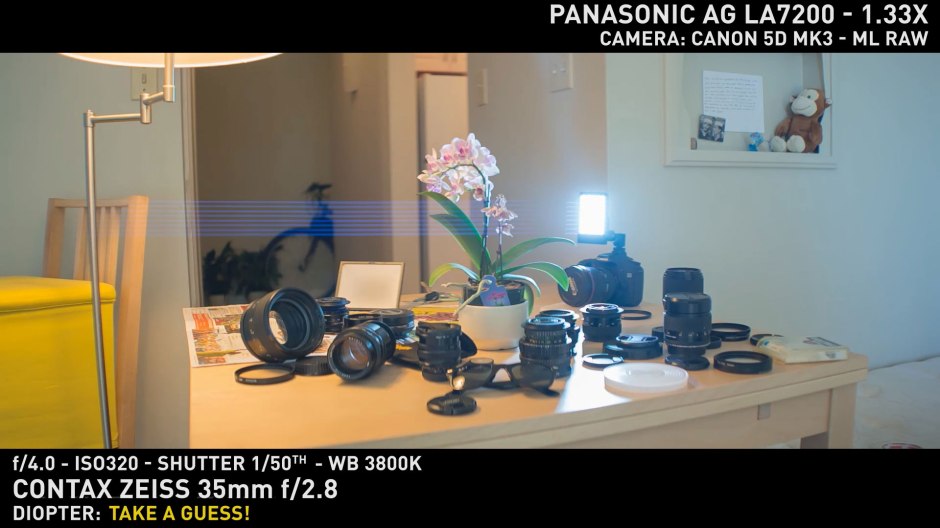
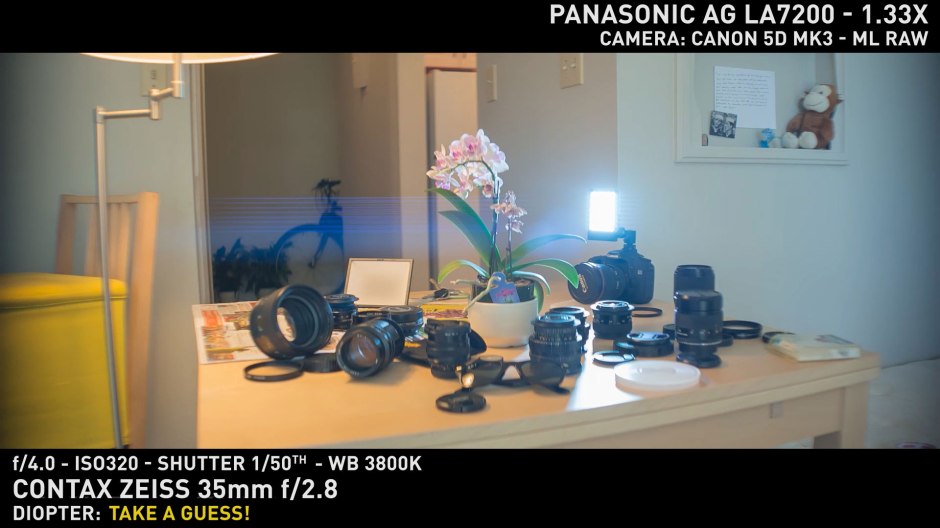
On the shots with the Contax Zeiss 28mm and the Canon 5D3, it’s pretty easy to spot when we have the diopter on because of the massive vignetting the additional rings create. Also, there’s some more spreading of the light around the source, like a haze, but no real improvement in quality. Maybe just a tiny bit. Without the diopter, the taking lens was focused at 1.3m, and then at 2m with the diopter, which means something changed in the system. On the 35mm the vignetting doesn’t appear so it’s a 50/50 change of guessing it right. I can’t tell the difference. We’re really pushing the Panny here at f/2.8 and full frame.
Now onto the 50D shots. The 17-40mm is a great lens and its entire zoom range is covered by the Panasonic. This adapter has a thing for modern wide angles. It pairs perfectly with the 16-35mm f/2.8L as well, and even at the widest end of the 24-70mm f/2.8L. Anyway, back to the test, for me it’s a guessing game. I can’t tell the difference between having the diopter and not having it on!
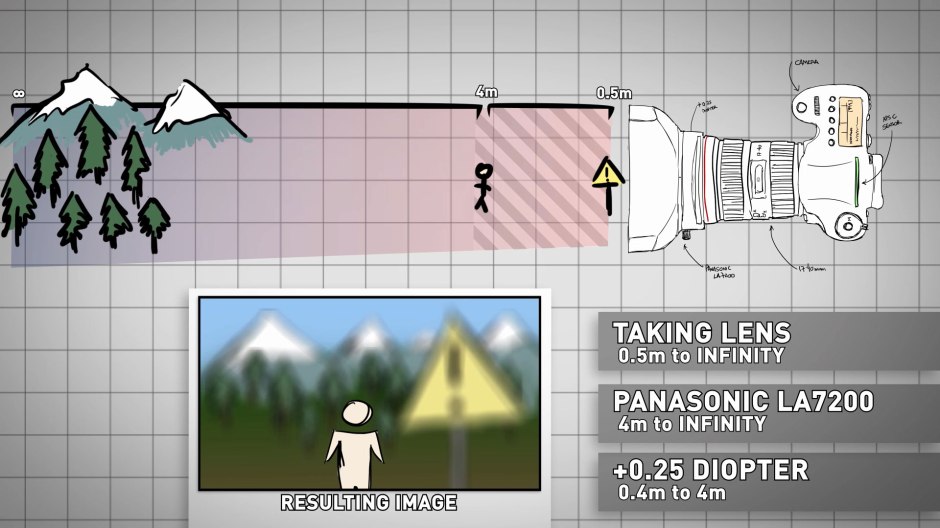
So, does the diopter affect low-light performance, edge quality and close focus, or is it just one more element in the system? Let’s try some math and see if the initial idea makes sense. First, we have our taking lens, that focus from let’s say, half a meter, to infinity. Then we have the Panasonic, focus fixed from 4m to infinity. The diopter is a +0.25, which means its infinity sits at 4m. Now if we put the diopter in front of our taking lens, we’re limiting its infinity to 4m. The Panasonic’s focus range STARTS at 4m, so this whole thing should only work well at infinity for the taking lens and a subject sitting 4m away from camera, at least, that’s what the math leads us to.
In a straight answer: does this diopter improve the Panasonic’s image quality if sitting between it and the taking lens? Nope!
Of course there are tolerances which allow rack focusing, f/4 improves sharpness overall, by reducing the circle of confusion, so the blurred areas are not that noticeable. Should you put the diopter in front of the Panny, that could bring you some advantage because the combination of the taking lens and the Panasonic is now subject to the diopter’s effect and your system’s infinity now sits at 4m.
Now, this was a more “scientific” video. Do you guys like this kind of subject? Do you hate math? Please comment below so I can work on more ideas! If you like anamorphics overall, then subscribe because this channel is for you! There are plenty of other videos here on this subject! Last but not least, head on to my blog for the full – FREE! – Anamorphic on a Budget guide. See you next week!
Does sticking a +0.25 diopter between the taking lens and the Panasonic LA7200 actually fix all the Panasonic’s issues? Let’s test and see!
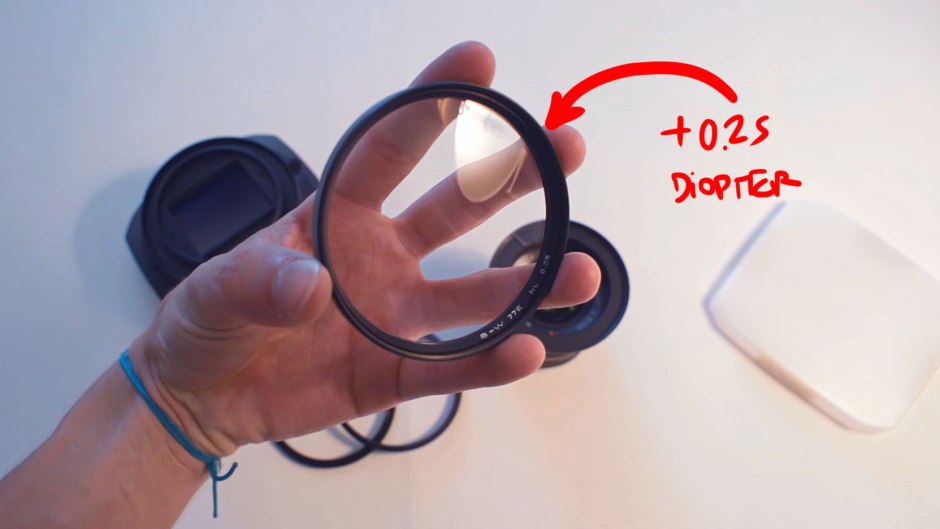
Thanks to Rob Bannister, my partner at Creative Camera Rentals (creativecamerarentals.com), for getting me the +0.25, and Gearhouse Camera Rentals for the Panasonic LA7200.
All the RED links on this post are part of eBay’s Partner Network, so if you purchase anything through them, you’re helping me to keep this project going.
Hey everyone, Tito Ferradans here and we’re going a little mythbusters on this episode of Anamorphic Chop Shop.
So, I think EVERYONE who owns or owned a Panasonic has probably seen this video from Eyepatch Entertainment and spent hours on end trying to grab a +0.25 diopter and fix this piece of glass. Well, thanks to my friend Rob Bannister, my partner at Creative Camera Rentals, I was able to get my hands on a huge 77mm +0.25 B+W diopter and got the Panasonic LA7200 from Gearhouse Camera Rentals, again, here in Vancouver, which got me a nice deal on the lens again, so I could FINALLY test what’s being said in the video.
I don’t have a RED Scarlet at hand (getting the glass was already hard enough), but I’m going with my loyal 5D3 and the new-old Canon 50D. I’m shooting this before going to my tests and then later I’ll try to piece together what the shots tell us but I’m gonna take a few guesses at HOW and WHY the shots on Mark’s video look so good and sharp. First, the Scarlet shooting at 4k has a 1.6 crop factor, which leads us to a “smaller” sensor as the area being used. Same goes for the GH2, even a smaller sensor. Second, his taking lens is pretty wide, from 17-35mm and mostly at f/4. The Panny can perform good naturally at f/4 and such wide angles. I’m thinking the shots would look pretty much identical had he taken off the diopter between the lenses. I might be wrong, of course!
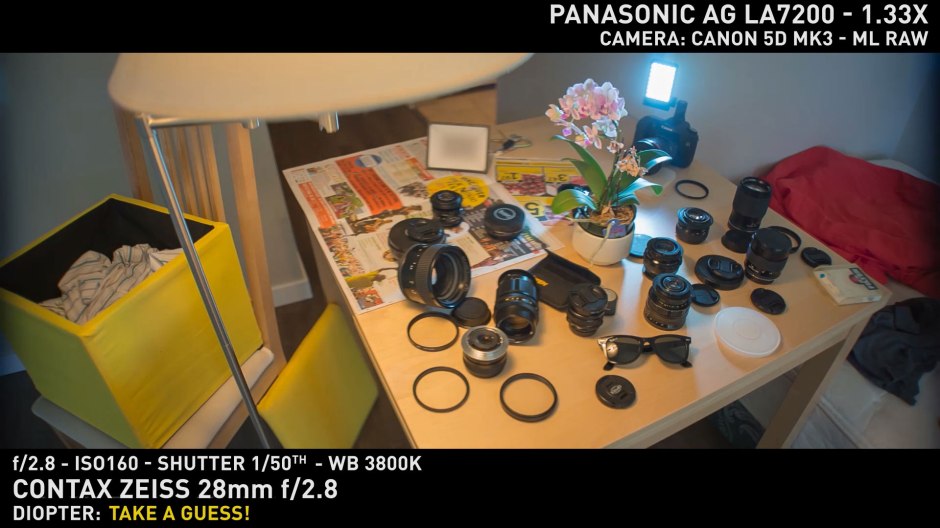
So what I’m gonna do is shoot a few tests with full frame, using the exact same setup with and without the diopter, not even moving the camera. I’m picking my Contax Zeiss for these and going with a 28mm and a 35mm so you can try to keep an eye on what changes. Then, some random shots of a hike I did with friends and Davie Street at night, shot with the 50D and using a Canon 17-40mm f/4L as taking lens. I’ll mix the shots with and without the diopter in the edit and see if you guys can identify them based on image quality. That should be the supreme test for performance increase, right?
Well, click here to go to the test video (each shot is numbered, to make guessing easier) and next week I’ll have them with all the specs listed, overall and specific comments and also an explanation if this trick actually works or not! It would be awesome if you left some comments on what you expect to happen, why you think so and guessing which clip was shot with/without the diopter!
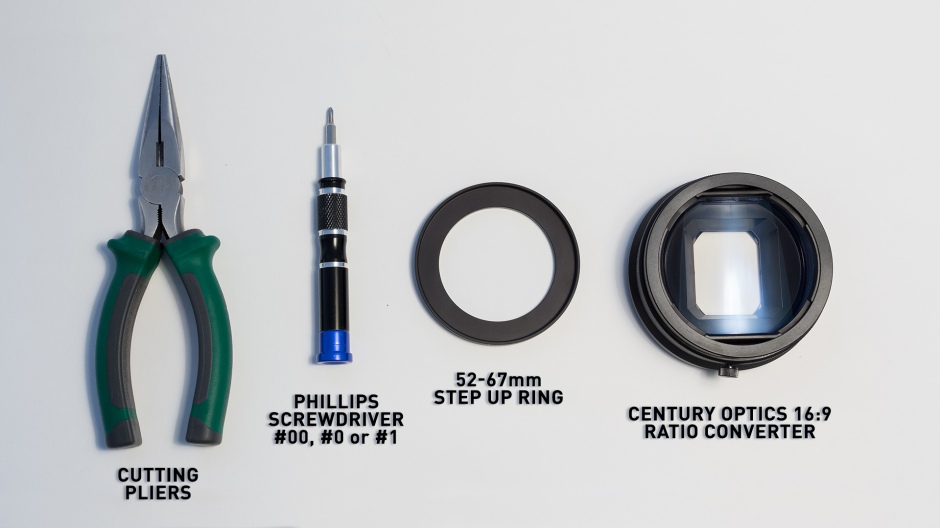
A very quick guide showing how to replace the bayonet mount on the Century Optics 16:9 adapters with 52mm filter threads so it can be used with regular lenses.
All the RED links on this post are part of eBay’s Partner Network, so if you purchase anything through them, you’re helping me to keep this project going.
I’m Tito Ferradans and this is Anamorphic Chop Shop. Today I’ll go over modding the Century Optics adapter from bayonet mount to 52mm threads.
First off, you’ll need the adapter, a 52-67mm step up ring, a phillips screwdriver, #00, #0 or #1, any of these will work. You’ll also need cutting pliers if your Century has a Canon bayonet.
The version I have here is the Sony bayonet, for the VX2000, which is VERY easy to mod. First remove the screw on the side, then unscrew the lock off.
The Canon bayonet (for the GL1, GL2) has a stopper inside, while the Sony doesn’t. You’ll need to use the pliers to cut a slice in the step ring to fit the stopper, otherwise it won’t be possible to reassemble the lens. Luckily for us, this Sony version just needs you to sandwich the step ring between the main body of the lens and the lock. The 52mm thread side of the ring will fit snuggly around the rear element.
Now just screw back the lock and put the little screw back into it’s spot. Tighten it well so neither the bayonet lock rotates nor the step ring inside it, messing with the anamorphic’s alignment.
As explained in the Century review, you can use an 82-72 or 77-72mm step down ring with electrical tape to create front threads, and voila, now you have a production ready adapter!
Special thanks to Matt Leaf for lending me the lens for this video.


You must be logged in to post a comment.