Anamorfake your Helios 44 by opening it up and using an oval aperture. Anamorphic bokeh made easy and with very little cost! All steps explained and links provided at the blog.
Tito Ferradans here for a shorter than expected Anamorphic Chop Shop episode. I expected this whole thing to be a little more complicated. Thankfully I was wrong. Cutting to the chase, in this episode I’m gonna show you how to open up the
Helios 44-2 in a non-destructive way and use your own aperture discs. Before I start on the procedure itself, this technique was
first shown as a vimeo video by
Amir Safari, in late 2012. I messaged him about it and we talked a lot, he explained me how to open up the lens and even sent me some of his spare aperture discs through the mail since I couldn’t make mine anywhere in Brazil. Amir is still doing aperture modifications to some other lenses and if you like what you see here, you should definitely check his
Train Station test video – you can find the link in the blog post.
First thing you should do is print out your aperture. I have links for 2x ovals and different iris values (f/2.8, f/4, f/5.6 and f/8), you can just download them and get them laser cut. Here in Vancouver I just went to Laser Cutter Cafe and that costed me less than CAD$10. You can also design your own aperture blades, as crazy as you want them, feel free, be creative. Another option is to use transparent sheets of plastic and color them using markers. Just a hint of how crazy things can get.
UPDATE – OCTOBER 2016: I’m selling aperture discs for this mod on a small scale on eBay, so if you’re looking to get some for a decent price, check out the listing!
Next step is opening up the lens. The first time I did this mod, I came through the front and had a ton of extra work and even messed up the focus helicoid. Ended up damaging the blades and having a stuck iris. If you open it from the back, you’ll have to put a little strength once but then it’ll be as easy as attaching filters. I’m using a lens wrench (less than $15) just to make life easier. You can see there are two different slots for the wrench, you need to pick the outermost one, which is liked to this thicker piece.
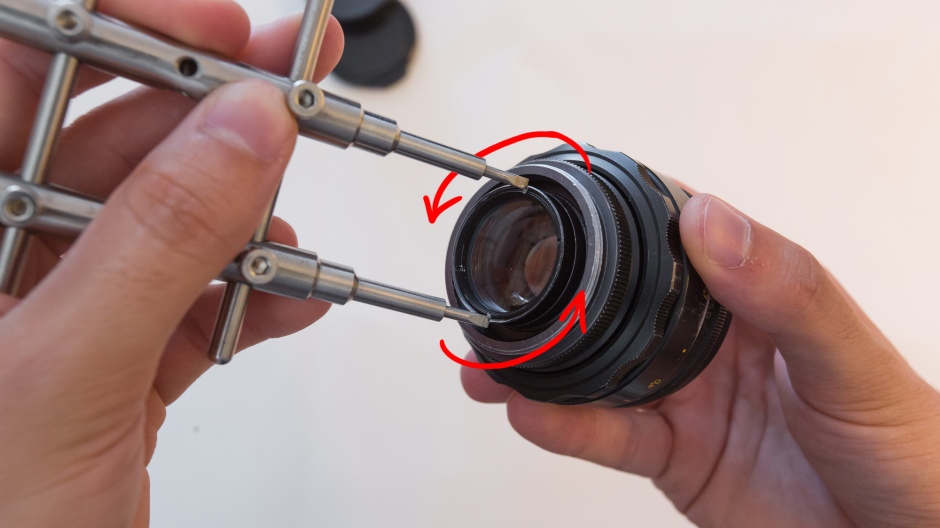
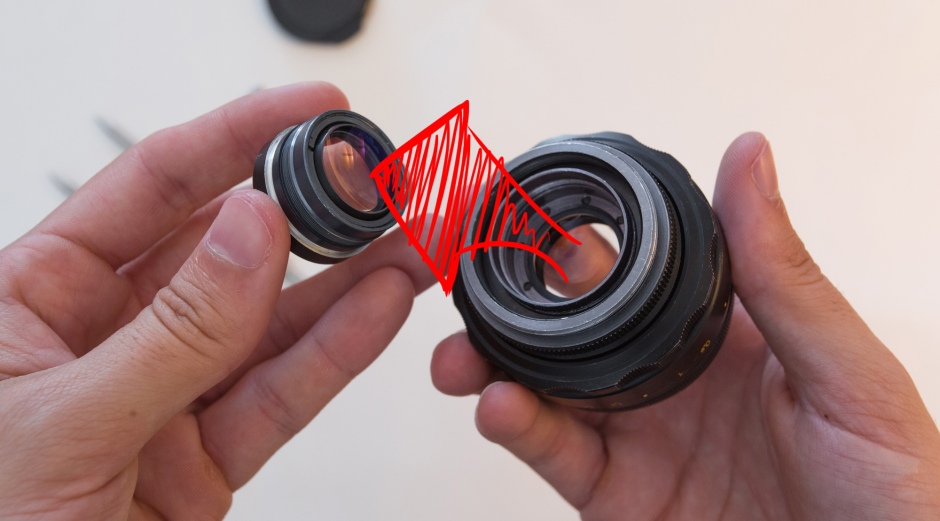
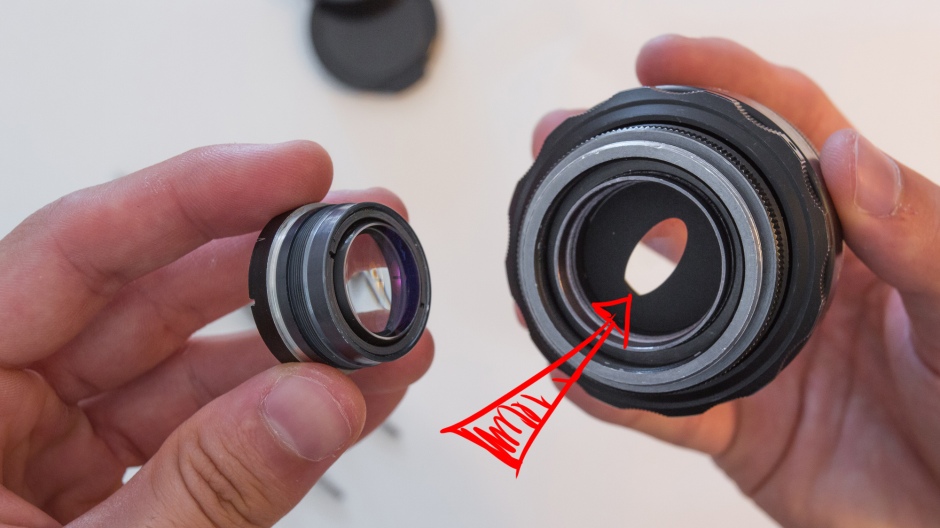
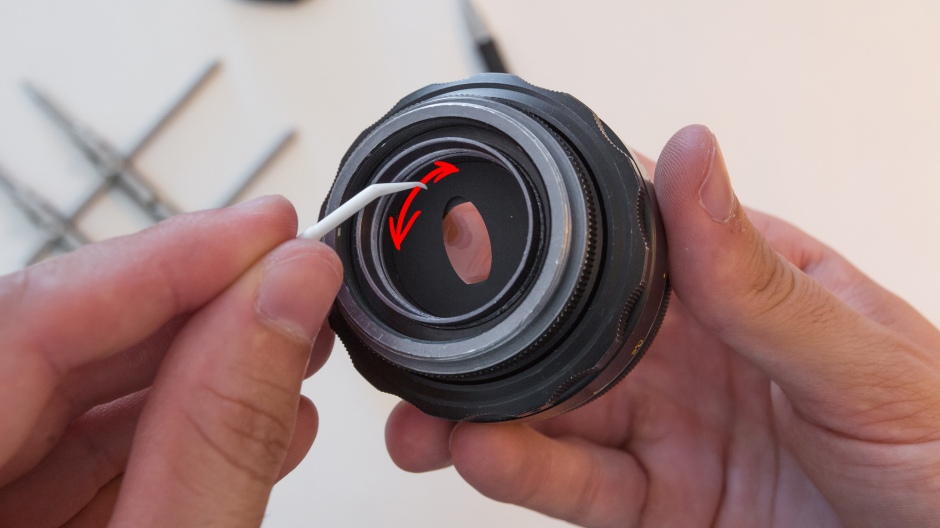
So, twist the wrench anti-clockwise (I always get this wrong) and remove the rear optics. Now you’re looking at the iris mechanism. Just drop your selected aperture there and close it up again. One issue you might face is getting alignment right, which can be a little tricky. In my case, I did a tiny mark on the side of the lens that’s facing up, and then using a toothpick I aligned the oval with that mark and then closed the lens back.
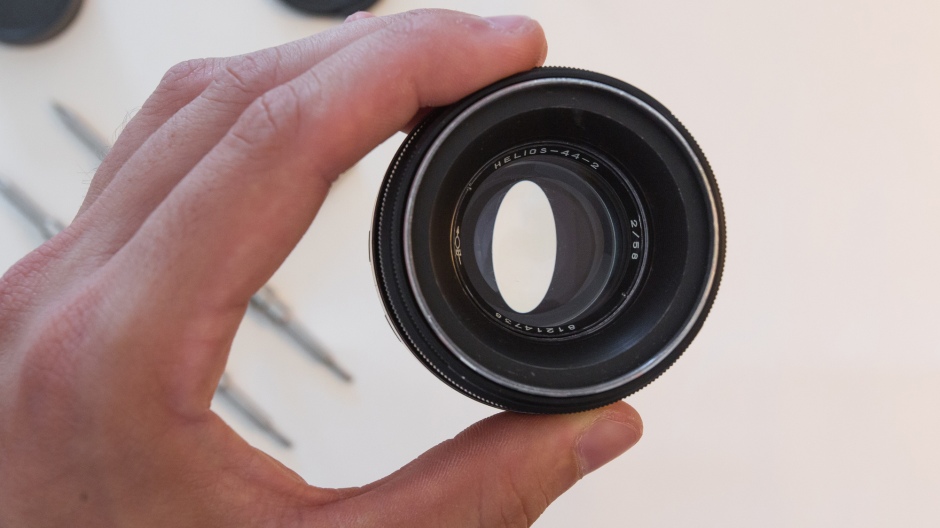
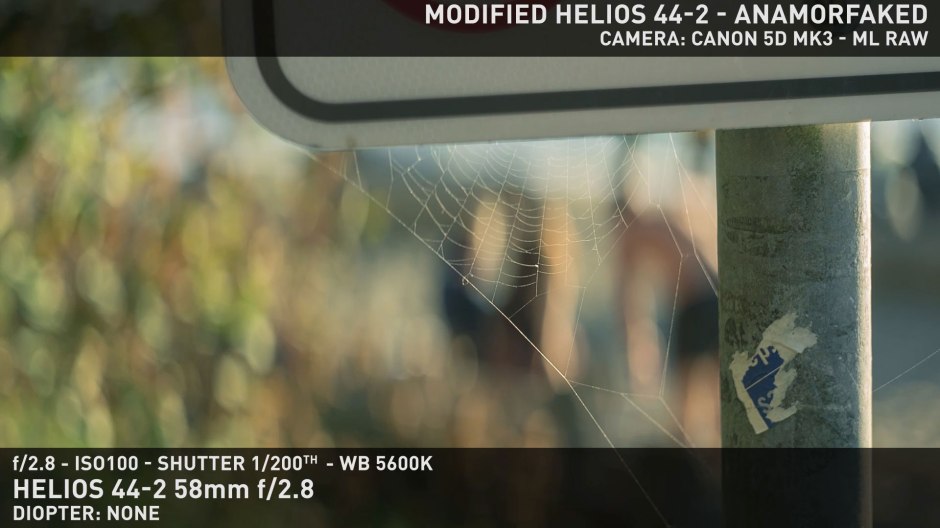
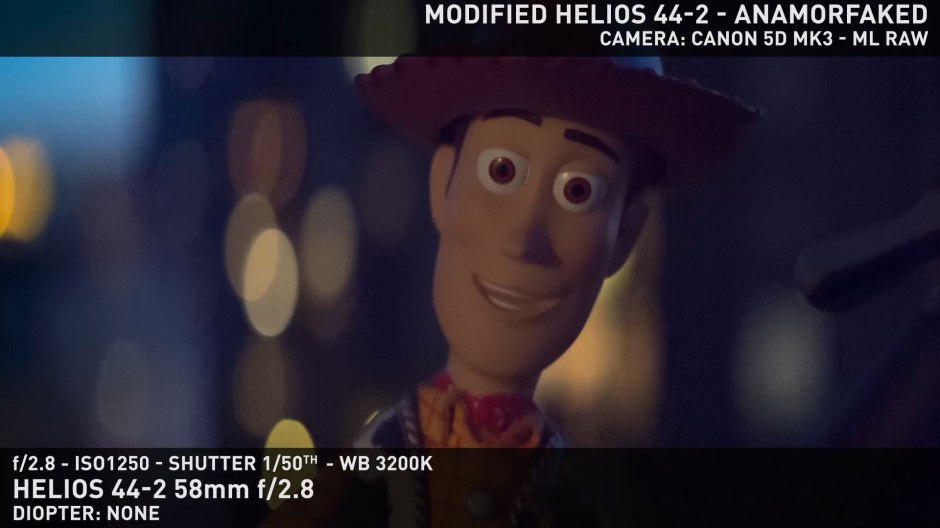
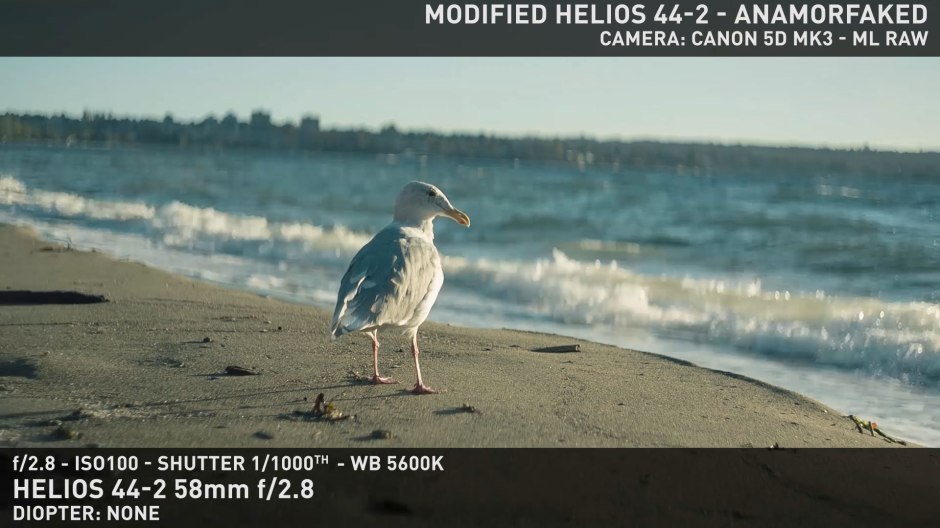
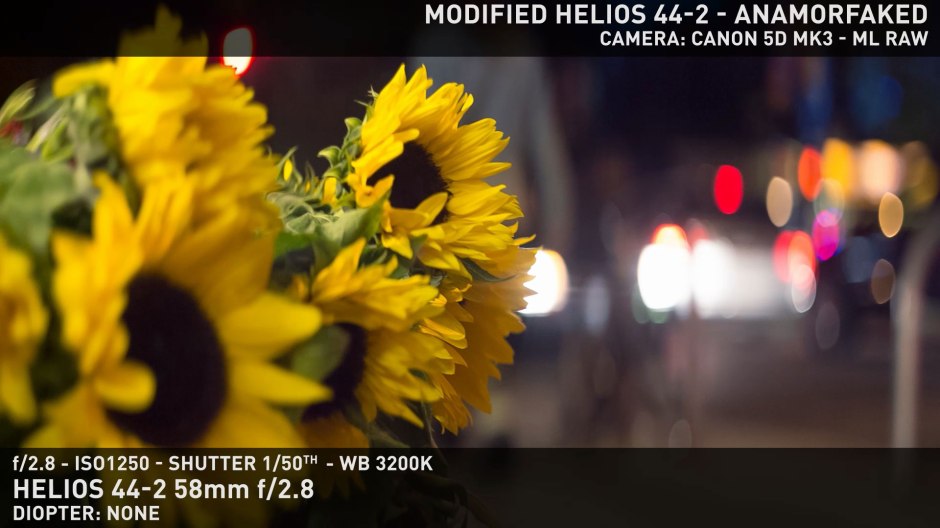
And that’s it! We’re finished! Here are just a few shots to prove my point. Combine this with a flare filter and you have a complete anamorfake look, with close focus, single focus, lightweight, pretty ovals, sharp image and the Helios 44-2’s pretty flares.
I hope you guys enjoyed this video, subscribe to the channel for more content, check my blog for some extra information regarding this mod and other anamorphic matters. Also, if you know of anyone who’d be interested in this modification, send the video their way. I’m trying to constantly upload new stuff, but your help spreading the word is a huge boost for my morale along the bleak fall and winter months I have ahead! Thanks for watching, and I’ll see you soon! Ferradans out.

[…] back. Reassemble the back in the same way, but don’t fit it in yet. Time to do the oval iris. I had the acrylic disks from the previous tutorial, so I just grabbed one of those. You can choose your aperture value, I’m going with f/2.8 […]
[…] folks, Tito Ferradans here for another Chop Shop. Playing with the Helios was cool, but as any of you anamorphic users out there know, the true challenge with scopes is […]
[…] in the same way, but don’t fit it in just yet. It’s time to do the oval iris. I had the acrylic disks left over from a previous tutorial, so I just grabbed one of those. You can choose your aperture value, I’m going with f/2.8 […]
[…] back in the same way, but don’t fit it in just yet. It’s time to do the oval iris. I had the acrylic disks left over from a previous tutorial, so I just grabbed one of those. You can choose your aperture value, I’m going with f/2.8 […]
[…] approach, however don’t match it in simply but. It’s time to do the oval iris. I had the acrylic disks left over from a previous tutorial, so I simply grabbed a kind of. You may select your aperture worth, I’m going with f/2.eight […]
[…] back in the same way, but don’t fit it in just yet. It’s time to do the oval iris. I had the acrylic disks left over from a previous tutorial, so I just grabbed one of those. You can choose your aperture value, I’m going with f/2.8 […]
[…] back in the same way, but don’t fit it in just yet. It’s time to do the oval iris. I had the acrylic disks left over from a previous tutorial, so I just grabbed one of those. You can choose your aperture value, I’m going with f/2.8 […]