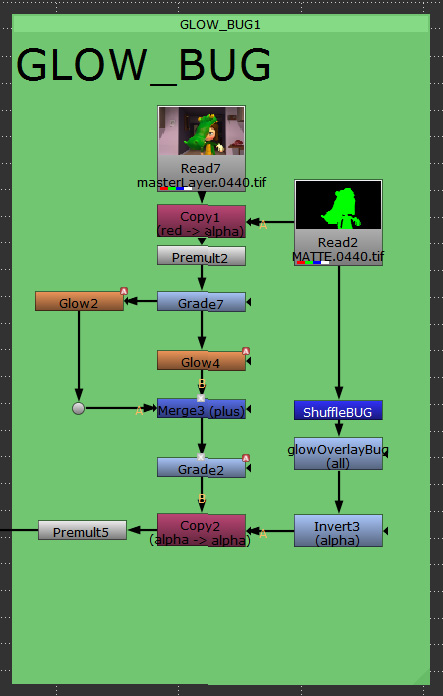
This is a two-part post (day and night), and can get confusing because I wasn’t so organized as I was when working with the Later Alliegator assignment. My maya file was broken, because I was stupid and did all my surfacing in a layer that wasn’t my masterlayer. This fucked everything up, because the textures would go wild if I tried creating any more layers, or even changing to the masterlayer and back. So I did one pass at a time, focusing on the ones that would be useful for both day and night setups.
When breaking down the scene, since the trees wouldn’t render with Final Gather, they had to be on a separate pass. Also, Would be really useful to control the lamp posts and the restaurant patio independently from the rest of the set, so I broke them down too. This got me three major passes, BG_Set, FG_Set and Trees.
I’ll try not to go into too much detail regarding each node – unless it’s a really cool or useful thing – so this post doesn’t take forever to write/read.

Tree overview
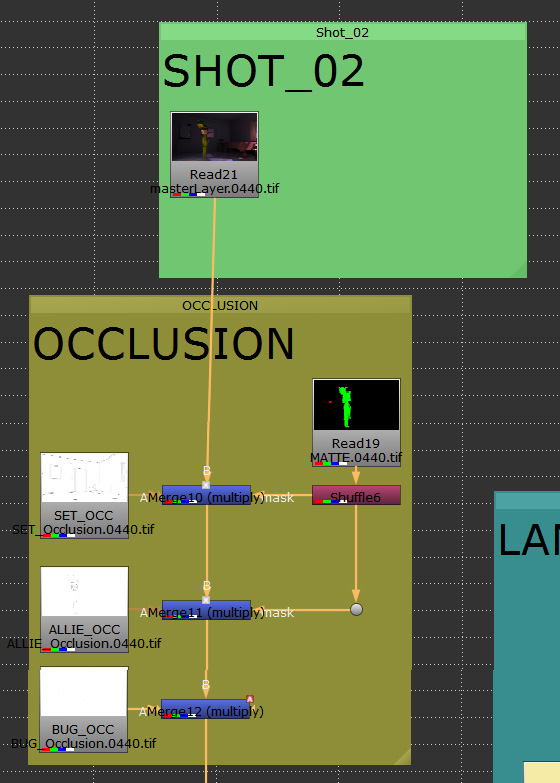
DATA PASSES
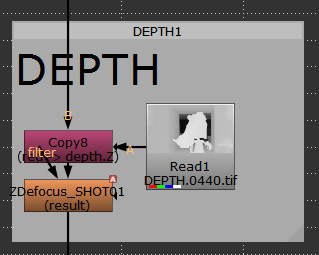
I know most of these aren’t really DATA passes, but I’ll call them that way because they worked for both sets. Ambient Occlusion for each of my three layers, rim for all three, depth for the whole scene, a matte for the sun and lamps and, for the night setup, a matte for all the restaurant glass.


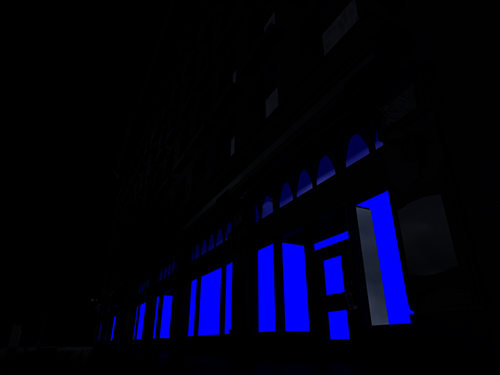
DAY SETUP
For my daytime lighting I had two lights in Maya and the HDRI image. One of the lights was my sun, and the other one worked as a stronger rim, linked only to the foreground elements (umbrellas, tables and chairs). At first, my HDRI was too bright for a sunset and made it look as if I had a strong fill light coming from the camera. The reflections were also wrong, too much blue.

I worked around this by getting a different HDRI and editing it in Photoshop to match the sunset.

I didn’t get rid of my first image though, as it would be very handy if I thought the scene was too dark and wanted to fill some of the shadows.
Moving into the foreground, I did the exact same thing. Had a version with the brighter HDRI and another one with the sunset look. On this layer, the sunset version was way darker than it should. Mixing it up in Nuke would be easier and faster than trying to fix the HDRI and then re-rendering, so I moved on with both images as well.


For the tree, I disabled Final Gather and also made two versions of it. Since the sun was right behind it, adding a strong orange rim to it would be very nice looking, so in one of my versions I increased the translucency of the material for the leaves, and in the other one they were more opaque. This allowed me to have perfect control of contrast in the inside areas of the tree, and how much sunlight rim I would dial in. This rim was created the key light, of course.


I still don’t know exactly why, but I made a separate render for the sun, so I could move it around quickly if needed. This could be done with the matte pass, but I was feeling lazy about finding that orange again. Anyway, this step is totally unnecessary.

I could do a sky pass. For the first two versions I actually did a sky pass. After trying to move it around and get a better angle in Nuke, I decided to import the image I had for the sky in Maya and framing it properly during the comp process.

After all this rendering – which had to be done in VFS, since Maya 2015 wasn’t letting me do light links at home – I moved into Nuke.
First thing to do was set up my comp resolution, import the sky, reformat it to the proper size and position it around.

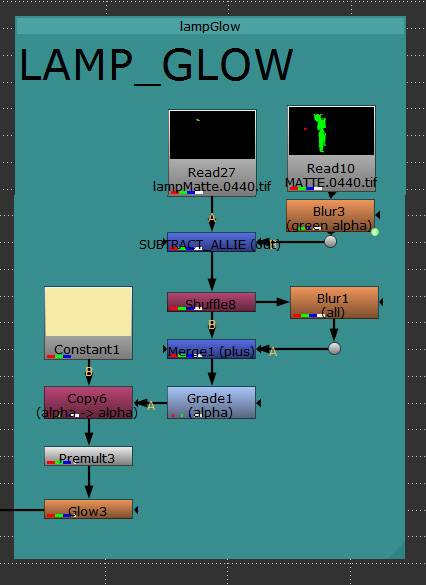
After that, coming from the back to the front, the next thing in was the sun. That orange circle, as it was, wouldn’t be convincing as a proper sun, so I added in some glow to it. Actually, I added three different levels of glow, getting a subtle effect to it. The Constant node doesn’t have any blur to it, just the sun’s alpha channel, so it would act as the more defined sun shape in the sky. The Constant also allows much more control over its color.

All merges here must de Plus, since it’s all light information. When merging it over the sky, I had to mix it with a really small value, otherwise the sun would be the brightest part of the frame, drawing to much attention, and making hard to see the restaurant below.
I had about three different versions for the sun’s intensity and position until I reached one that worked well. I won’t post them here because this post is already too long.

Moving forward comes the background set. Nothing fancy here, just a small trick with the merge node between the two renders, so I could control how much fill I wanted. The light version, on input A, has a very small ammount in the mix (something like 0.02)

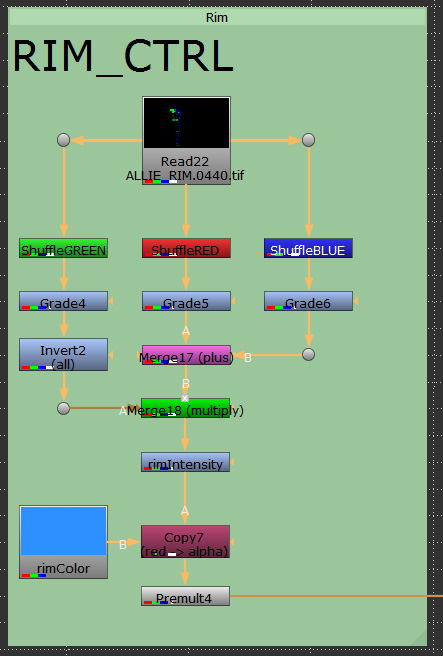
After that, rim and AO. From the rim pass, I just wanted what was coming from the red channel, so I discarded the other two – not like what we did for the Later Alliegator.

For the trees, I did the same as for the set, with a merge node controlling how much light would come through the leaves.

For the rim, I wanted to mix things up, so ended up using all three channels and tinting it orange. It’s a very small detail, but works pretty well in the background, as if some light rays were making through the foliage.

Things are getting repetitive, right? One merge node to control the contrast of the foreground, but here a couple blur nodes masked by a roto node show up. These are meant to blur the top left lamp post, as if it was closer to camera. The depth wil help too, but the result was too subtle and I needed more.

The weird orange lines from the blur nodes mean they are clones, so changing one of them affects the whole family. This is very useful to make sure I didn’t have different blur values for each layer, which would definitely not look right.
The rim pass was also somewhat weird, with light under the umbrellas, so I did some roto to take it out. The rim helped A LOT in getting the focal point to the foreground.

The last nodes added to the pipe were an extra glow to the sun, on top of everything, like a bit of flaring on the lens. It had to go on top of everything, but not too much, so I used a combination of the alpha channels from the background and the trees to make sure it wouldn’t pop up somewhere else.

The blur node smudges the flare around the edges of the alpha, making it look right. The Copy node does the same trick as usual, transfering what I had into the alpha of the Constant and getting cut out by the Premult.
After all this road, I still felt the patio was too dark, and wanted to bright it up just a little, which brings us to the grade node and the roto, to control its effect.


You must be logged in to post a comment.