Browsing Category:

Hovering Lights

Hovering Lights

Term 3 Final Presentation.

December 13, 2014

Yesterday we spent the whole day grouped together in room 105, reviewing and getting feedback from our mentors regarding our projects. It was pretty cool because we got to see everyone else’s projects, not just our own. Some very nice reels at work in 3D111, gotta tell you.

I was the second to last to present, so I ended up taking notes for a lot of people too. The review for Hovering Lights was quick and, fortunately, not about technical aspects, but regarding some story elements, which, I think, is a good thing because it shows the mentors care about the story.

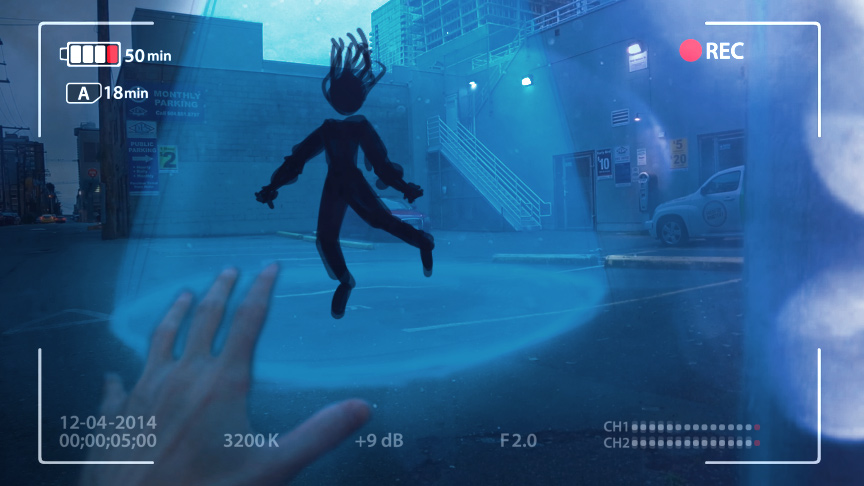
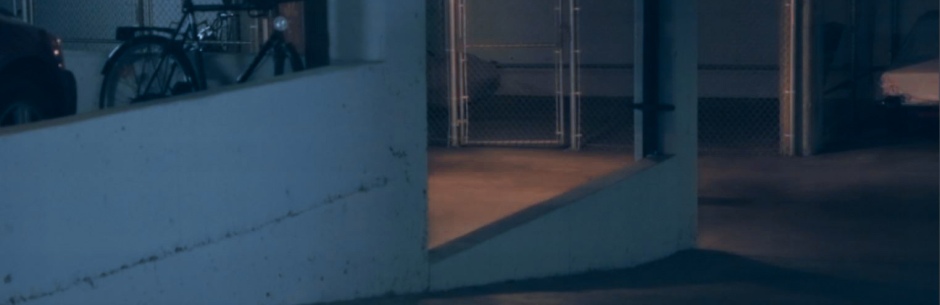
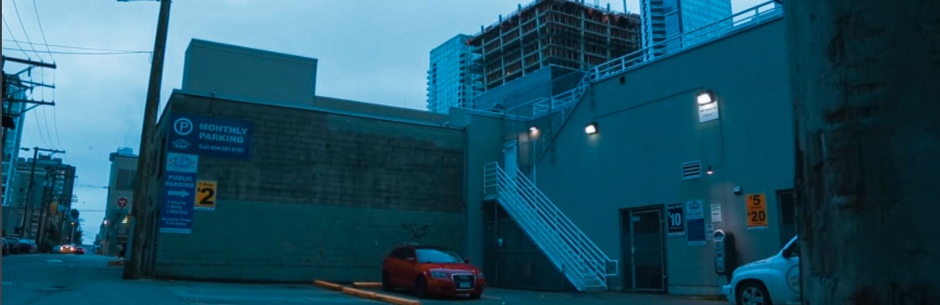
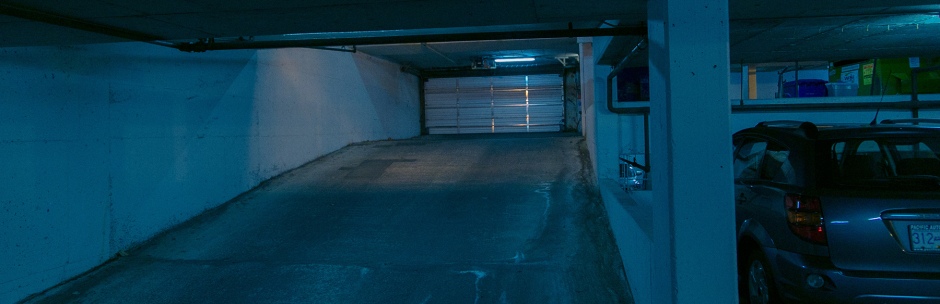
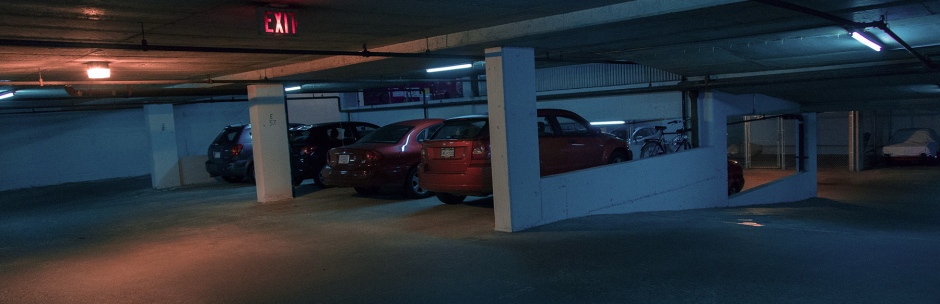
Their comments were very focused on the garage sequence, suggesting some more complex actions involving aliens and car headlights, but still keeping all the events in silhouette shape. After the presentation, Fernão also pointed out a great alien reference for this particular scene, from the XCOM game series. The looks of the creature are close to what I had in mind, but they’re shorter, and move on all fours, but very quickly. He mimicked their movement around the student lounge and it matches with what should happen in the scene. This, of course, means we’ll have a new version for the script as well, coming out soon.

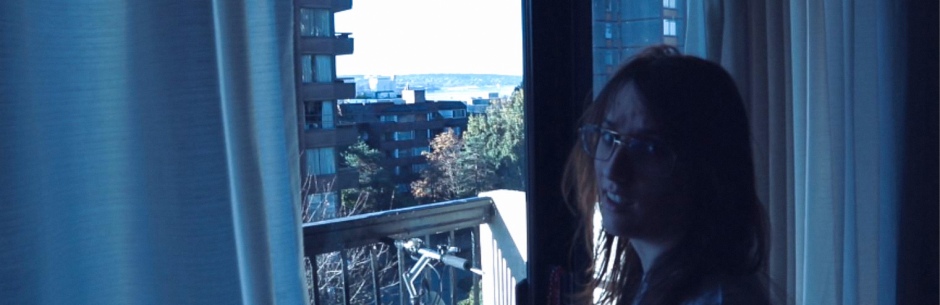
Another very important point of the discussion was about the aspect ratio for the whole reel. At first they thought the square aspect ratio of the first two shots was odd, and when I said “Instagram” they loved the idea and insisted that I had to do the whole thing Instagram-like, with duration-limit to every shot, as well as build up an instagram account to make the thing more believable.

This is an interesting turn in terms of the project development because it feels like a “back to its origins”. It started as a fake-video for youtube, to fool people into thinking it was a real event. Then I ended up bringing too much film into it, and with this, it’s going back to the believable illusion concept, which is also the heart and soul for Visual Effects: you can never be sure of what is real and what is not while watching a movie. I like the way this is going. If you wanna keep track of this and know when I start posting, just follow my brand new instagram (I never had an account and I actually dislike iPhones), the things we do for a project, right?

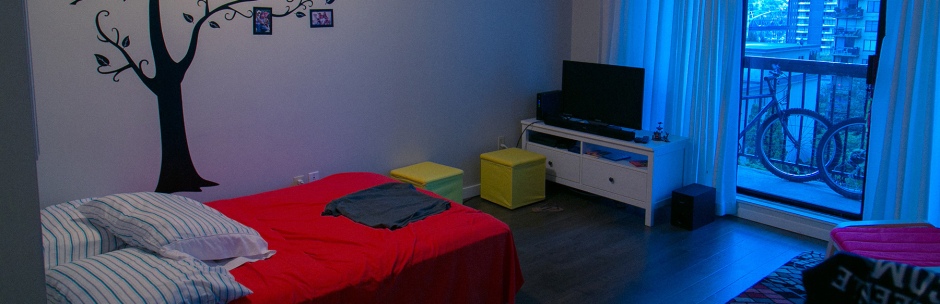
As extras, I’m posting here the one-frame slapcomps for the final shot, because they’re very close to what I hope to achieve. There will be much more detail in the ships, of course, but their menacing presence is well represented on these frames.


The following steps are reshooting the scenes using an iPhone to have a real reference of how it would look if shot on an phone, then when we’re ready to roll for real, shoot with a proper camera and wreck image quality as the last step of the process.

I still want to make a couple custom nodes for Nuke, for the camera overlays (that are being kicked off the project because they scream 1990’s) and some optical artifacts as well as the previously mentioned video glitches and corrupt frames. During the break I’ll talk to friends back in Brazil that can help me making the whole story and instagram account more believable.

Hovering Lights

Slap Compin’

December 9, 2014

I was feeling super lazy about working on slap comps. Fact.

In film production school all we do before the shooting is, SOMETIMES, a demo, which is a rough version of the whole movie in someone’s living room, with the director, producer and whatever crew members are available. It does help a little with figuring out the timing of things, but not too much. Almost all the ‘thinking’ is done during storyboarding and editing. We figure out how things should go together, we can see them playing in our heads, and foresee when the cut should happen. If it goes wrong, or isn’t fully achieved on set, it will be fixed during the editing process (which is quite long, even though most shorts are really short and don’t need all that time).

For our reels, we had a whole term (two months) of pre-production. Before the first class started I absolutely didn’t see the point in two classes a week to talk with mentors. I mean, it’s not like our projects are gonna be changing so much, so fast! Could’ve I been more wrong? Probably, because it can always get worse, but before breaktime of our very first class, I was already enjoying this much effort into pre-production.

Things escalated pretty fast until week four, when we met our mentors and had feedback from them. From their, I think I was too attached to my old ideas, and wasn’t so excited about changing them so much, to the point of reshooting a bunch of plates that seemed good enough for what they were supposed to do: kind of help people understanding my goals with the project. To me, everything was always clear as day, and when it wasn’t, I waited until ideas became less foggy.

Then last week happened and I noticed I had less than seven days to work out my final presentation for the term. I had a lot of changing in the script, reshoots, slap comps (which are quick and dirty versions of what you aim to achieve in each shot), new designs and a new premiere file to put together. CRAP!

Shot last Saturday (or was it Sunday?), just enough to make it work. I didn’t want to wrestle with Nuke and Maya for this, otherwise I was sure to miss the deadline, so I stitched the shots together in Premiere and from there I moved into After Effects – since it’s quick and dirty, nothing beats that definition from my experience with AE (eight years and counting).

I started doing the shots, as simple as I could, putting in as much of the final look as I could. Color correction? Check. Camera overlays? Check. Damaged footage? Check. Noise, practical effects faked in post, poor roto and garbage mattes, even a lot of audio work. After about six hours non-stop, new ideas started to pop up. Simple things that could make the shots better whithin themselves, an extra 2-second shot without any VFX that could really help blending between cuts, elaborate ways to fake camera movement and avoid nightmarish tracking, lighting setups, suddenly I was checking the ceiling for holes and gaps where I could attach a screw to hold a flashlight, or shooting reference of shadows through the curtains.

Most of this happened during Monday morning. By the time I left home to class I was so euphoric I couldn’t even take the bus and went walking so I could better process new thoughts. Wrote down a couple pages of notes, methods, plans and ideas that will be put to the test during winter break and term 4. Slap comping was also great to feel the timing of the effects. Imagining a person’s actions or dialogue is easy, but how can you measure a brief second of floating objects and your reaction to it? Where are they floating, exactly? What objects are floating? How long does it take? Everything we can’t see with our own eyes when shooting is greatly improved with a slap comp.

I feel the animatic itself is a little fast paced at this moment, and I will fix that when the final shooting comes. I’ll also need some extra hands to deal with practical tricks that will reinforce the digital effects. Last version coming up here on Friday, along with feedback from mentors and classmates.

I’m really excited with this project right now!

Hovering Lights

Grade Tests, V1

December 2, 2014

During this week we’ll talk about the role of color on our reels. For such classes I worked on some grading for my current frames, aiming at the look I want on the final product: something that feels colder while keeping skin tones almost natural, just a bit less saturated and still have a nice color to draw attention to things (red, as you’ll see below).

Frames are cropped in a wild aspect ratio just to make it easier to see the colors as a “strip”. I like them this way, but will stick with 16:9 aspect ratio for this project. The garage and exterior are still too cyan when compared to the interior, but my footage couldn’t make it all the way through without looking too weird for this part of the process.


These are slightly different than what I had in the previous presentation, and I’ll have much more room to play with colors and the overall image once I stop shooting H.264 and go RAW. The pictures below shot my locations, as well as how the red color still punches strong through all the blue, which almost calls out to be used in a creatively manner. I’m definitely not missing this chance!


Hovering Lights

The Script, V4

November 26, 2014

I thought it would take longer to write the next post, or even to rewrite and adjust the script, but life at VFS is full of surprises, right?

Made all the suggested changes, tweaked a bit of the action, made the ending a bit faster and more possible to achieve (what was I thinking when I wrote that previous version?).

It took me some time to get over the death of the silverware scene, I think that’s why it took so long to actually sit down and change this thing. Anyway, in the future, if life isn’t so hard, I might try to do it, not necessarily related to this demo reel. I’m really curious about how to pull it off.

Hovering Lights

Mid-Term Presentation.

November 26, 2014

Last week we had the mid-term presentations for our projects, when we met our mentors for the entire journey and got feedback from what we have so far. Remember when I said it was unlikely the script would go through more changes? I couldn’t have been more wrong. Before going into the feedback received, let me first get the video in this post, so you know what I’m referring to. For the color coded image on the top-right of the screen, green is live action footage, blue are CG elements and yellow is matte painting/unknown.

Brent suggested a whole bunch of changes, not only to the effects, but regarding the story as well. The nightmare-floating-silverware shot is going down, and the scene will be replaced with something related to electronic interference on the TV, computers and gadgets, which will be fun to do with a bit of nuke scripting to control the effects instead of using third party plugins. This way I’ll also have some chance to play with green screen to shoot the scenes that will fit into the TV, and some weird motion graphics for phones and computers. Not to mention some planar tracking and roto for replacing the screens.

Moving forward we get to the scene where I’m annoying May, and here I’m thinking of including some floating objects, right before we see the ship out the window. Maybe she throws something at me and the object is suspended mid-air, like a can or a pen, a small and easy to model asset, preferably. Then we go to the balcony, and the shot is broken in two parts, wide angle and zoomed in. The zoomed in might be a camera projection, so I have more control over the placement of the ships and avoid going through tracking a shaky punch in. The mothership is gonna be further in the distance and we’ll have some smaller versions of it closer to the buildings, with things coming out of them.

While watching this version of the presentation, Miles said he totally gets the characters’ feelings of “this is so awesome, but so wrong and scary at the same time!”. I think the dialogue made the story way easier to understand than the previous versions (which never made to this blog, and probably never will).

Then the characters get scared off the balcony and run to the garage. All this running is gonna be shortened, because it doesn’t add much to the story as well as it makes some people sick from all the motion and shakiness of the shots. The cuts are also gonna be adjusted so it doesn’t jump from one environment to the next and it looks like a seamless transition.

In the garage, I’ll have a silhouette moving across the light path, and for this I’m thinking of doing the same thing as the balcony zoom in, having a separate shot that blends in during the lens movement, based on a camera projection. For this one, I’ll get some extra lights to cast a real life moving shadow and have that as reference for animation and integration. A 2D alien character rig is also on my near-future plans, so I can animate it in front of a virtual light and have a decent silhouette on the ground.

Then, for the final shot, Fernão gave me a really good advice regarding realism: if the character’s girlfriend is being taken away, he wouldn’t just keep filming. A decent person would drop the camera and run towards the girl, to try and grab her! I still don’t know how to do it, but relates pretty well with Cloverfield, so, this might get even more complex.

For the final presentation, I need to have slap comps for all my VFX shots, and might as well have the final versions for all the non-vfx, storytelling shots. In the meanwhile, I still have a lot to do, such as the spaceship, a new version of the script, modeling (?) and rigging the card alien, and moving forward with my nuke scripting skills!

Not sure what the next post will contain, but let’s keep moving.

Hovering Lights

Asset: Trash Bin

November 24, 2014

Over the last couple of weeks I’ve been working slowly on this trash bin model for the final shot of the reel. I probably could go with a camera projection, but I had nothing to do during a weekend and decided to start. Oh, yeah, it was the location scout weekend. As reference for such enterprise I took our cardboard bin down in the garage. Spent about twenty minutes measuring every little piece of it, as well as pieces of other bins I wanted to bring onto my model.

Since I was already walking around with the camera during that morning, I shot plenty of references to keep checking how things were connected, melted or bent together. The pictures were pretty useful and covered a wide array of bin variations. I think the whole model was done in a Sunday, then, during the following week I worked on the UVs and stalled a bit before got into texturing.

Then, last weekend I was really inspired by the latest rigging class and decided to create some controllers for this bin, so I would avoid messing up the geometry while animating. Added a controller for each lid, which only goes up so much, before the lock hits the handle on the main body. At first I tried working with utility condition nodes, ended up with too many of them for what should be a simple “if, if else, else” statement, so decided to look up some MEL and write an expression linked to the lock’s rotation. Then, I added a (useful) condition node, to evaluate its behavior before and after a certain point, paired with a couple of driven keys to avoid crashing the lock through the handle as the lid opens and closes. It’s working pretty nice. The first one took me about two hours to get working. Repeating the process was less than twenty minutes for the other side.

Now I’m struggling to make the wheels work on their own. For this task I’ve had a lot of help from Nicko, with how the code should be written and smart solutions for what should be simple. The idea is to only place translation keyframes on the main body controller and the wheels determine their direction and spinning based on that information, being physically accurate and spinning like it would in the real world. I also plan on getting a “noise” slider in there, because these things NEVER work as they should and constantly the wheel sockets start spinning like crazy. As soon as it starts working, there will be a post here, with the code too.

Yesterday I decided to start texturing it, on a first experience with Foundry’s Mari. Paul provided me with awesome tips and simple tutorials so I started early morning and was able to reach the textured result below in about five or six hours, already including bump and spec maps (which I forgot to enable on this render). The key was, before going in and painting all the details in, I went back to the garage and surrounding blocks, taking pictures of all interesting stuff and details I could find on trash bins. This helped a lot with the textures themselves, as well as the general feeling for the asset. Mari is very easy to use and I’m pretty sure I could’ve been way more efficient with more experience.

Since I’m putting this much time into a beaten up trash bin, I decided to make it my standard object to integrate in every single assignment I can.

Sorry for the heavy GIF. I’ll figure out a way to make them lighter!

Hovering Lights

Why Canon 5D3 RAW?

November 17, 2014

I was about to write this huge and complicated post explaining how I’d shoot my footage RAW with a 5D MkIII running Magic Lantern, but the guys at Cinema 5D did several posts regarding that workflow, and google or the Magic Lantern forum can help filling in whatever blanks you end up having while reading their articles, so I’ll just focus on the creative and technical reasons why I’m choosing to shoot with a DSLR instead of VFS’ Sony EX-1.

I’ve been photographing using DSLRs for about six years now, shooting video for four and raw video since it was beta testing (roughly one year ago), so, I’m kind of used to the benefits (as well as the quirks) of working with DSLRs. It’s not a quick thing, grab the camera and go shoot, takes some time to get used to its weight, focusing (which is always a tricky exercise) and fighting against rolling shutter, which can ruin great takes.

Anyway, let’s get to the point: I’m shooting in low light (take into account the time of day I’m shooting and the internal environments as well), with little to none extra lights, so the full frame sensor is a huge boost. Add that to how well the 5D3 handles high ISOs and we’re on a good track. This “extra” light will be useful to increase my shutter speed and help with tracking, getting rid of some unnecessary motion blur. Ok, these would be good reasons to weight the 5D3 against the EX-1, but Magic Lantern’s RAW capabilities make the choice really simple.

A warning: even though the CHOICE was simple, the process is VERY FAR from simple, and can go wrong at almost any point. Here’s a little something to read and discourage most people from this path.

Now, back to the good (and dangerous) stuff: with fast enough CF cards I can shoot around 20-25 seconds of 1920×1280 resolution, which is a bit larger than regular HD footage and provides me extra margin for cropping, reframing, place tracking markers and, if nothing else, extra bits and pieces of footage. If I want a continuous shot, I can go down to 1920×1152 and don’t worry about frame skipping at all. That would be just for safety: I don’t think I have any shots that run even 20 seconds long. These ‘short’ 25 seconds create files close to 4GB. This gives you an idea of how heavy these things will go in post.

In terms of metadata, the guys at Magic Lantern are really doing wonders with their file format. It stores EVERY SINGLE PIECE OF METADATA that a regular photo would (and regular video wouldn’t). Shutter, iris, ISO, WB, frame rate, resolution, focal length and focus distance. The awesome thing about the last two is if you change them, during the shot, the change is recorded. Let’s say I do a zoom in in the middle of my balcony shot. The MLV file will store how long my zoom was, and both my initial and final focal lenghts. No need to say these features only work with Canon EF lenses. Manual lenses don’t provide that kind of information to the camera body.

After shooting, the fun begins. From the MLV files I can render out rough proxies (for general editing) as well as Cinema DNG 14bit frames that can be processed by Adobe Camera Raw or any other similar programs for huge adjustments. From those DNGs I’ll render out two “default” passes for each shot, one with extra contrast and sharpness, to be used for tracking, and a very neutral and flat pass for the final compositing and grading.

Last year, when we shot Zona SSP, RAW recording was wild, we had no sound, and very likely to find green or pink messed up frames among the good ones, what could, very likely, ruin your shot. Even though, things turned out good. Now the MLV file format is capable of embedding sound (which avoided me some nightmares) to the recorded videos, and we do have decent real-time players for the files too. The previous workflow required everything to be converted and proxied BEFORE you could watch any of the footage. Let’s say it wasn’t the most comfortable thing to be completely in the dark about what you just shot. Checking the footage is much easier now, thanks to MLRawViewer.

For testing purposes (since I’m not just gonna wake up one day and go out to shoot my raw demo reel), I’m doing all the assignments from now on that require live footage this way. It’s my way of bulletproofing the workflow and make sure I won’t make any stupid mistakes when the shooting day comes.